If you’re a Binance Coin (BNB) holder and want to add it to your MetaMask wallet, you’re in the right place. Adding BNB to MetaMask allows you to easily manage and use your BNB coins within the MetaMask ecosystem. In this step-by-step guide, we will walk you through the process of adding BNB to your MetaMask wallet.
Before you begin, make sure you have a MetaMask wallet installed and connected to your browser. If you don’t have MetaMask yet, you can download and install it from the official MetaMask website. Once you have your MetaMask wallet set up, follow the steps below to add BNB.
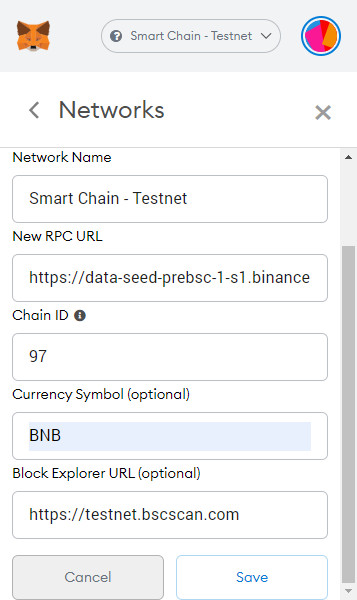
- Step 1: Connect MetaMask to Binance: Open MetaMask and log in to your account. Click on the account icon in the top right corner and select “Settings”. Scroll down and click on “Networks”. Now click on “Add Network” and enter the following details:
- Network Name: Binance Smart Chain
- New RPC URL: https://bsc-dataseed.binance.org/
- Chain ID: 56
- Symbol: BNB
- Block Explorer URL: https://bscscan.com/
- Step 2: Import BNB into MetaMask: Go back to your MetaMask account and click on the account icon again. Click on “Add Token” and select “Custom Token”. In the “Token Contract Address” field, enter the BNB token contract address for the Binance Smart Chain, which is: 0xbb4cdb9cbd36b01bd1cbaebf2de08d9173bc095c. Click on “Next” and MetaMask will automatically fill in the rest of the details. Click on “Add Tokens” to complete the process.
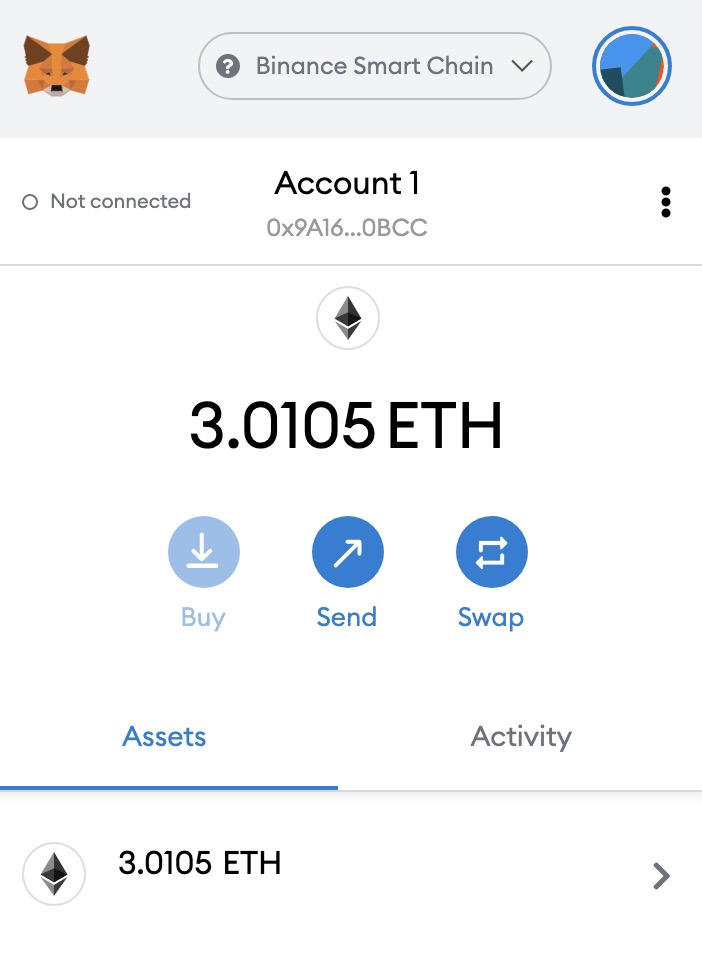
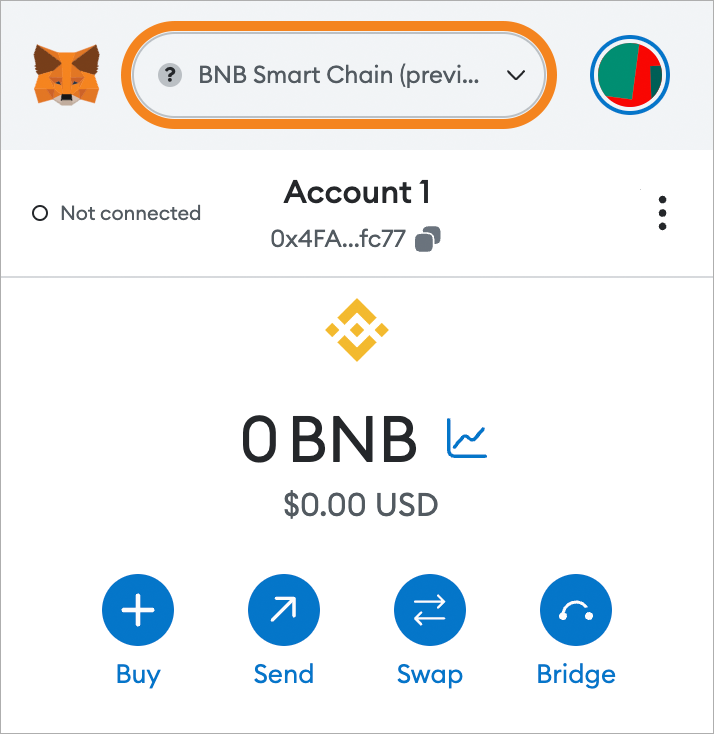
- Step 3: Check if BNB is Added: To make sure that BNB has been successfully added to your MetaMask wallet, click on the account icon and select the Binance Smart Chain network. Your BNB balance should now be displayed in your MetaMask wallet.
Following these steps will enable you to add BNB to your MetaMask wallet and have easy access to your Binance Coin holdings. Now you can use your BNB within the MetaMask ecosystem for decentralized applications, decentralized finance (DeFi) services, and various other platforms and protocols.
Remember to double-check all the addresses and details to ensure a smooth and secure process. It’s always recommended to exercise caution when handling your cryptocurrencies.
Creating a MetaMask Wallet
If you want to add BNB to MetaMask, the first step is to create a MetaMask wallet. Follow these steps to create your wallet:
- Install the MetaMask extension. You can find it in the Chrome Web Store or the Firefox Add-ons marketplace.
- Open MetaMask and click on “Create a Wallet”.
- You will be prompted to create a new password for your wallet. Make sure to choose a strong password and keep it secure.
- Create a backup of your wallet by clicking on “I’ve copied it somewhere safe”. This will show you a series of seed words. Write down these seed words and keep them in a safe place. They will be used to recover your wallet if you ever lose access to it.
- Confirm your seed words by selecting them in the correct order.
- You now have your MetaMask wallet set up and ready to use!
Once you have created your MetaMask wallet, you can start adding BNB to it. The next section will guide you through the steps of how to import BNB from Binance into MetaMask.
Installing the MetaMask Extension
To add BNB to MetaMask, you will first need to have the MetaMask extension installed in your web browser. Here are the steps:
- Open your preferred web browser (e.g. Chrome, Firefox, Brave, etc.)
- Search for “MetaMask” in your browser’s extension store or visit the MetaMask website directly.
- Click on the “Add to Chrome” (or equivalent) button to install the MetaMask extension.
- Once the installation is complete, you will see the MetaMask icon added to your browser’s toolbar.
- Click on the MetaMask icon to open the extension.
- If you already have a MetaMask wallet, you can click on “Import Wallet” and follow the steps to import your existing wallet into MetaMask. Otherwise, click on “Get Started” to create a new wallet.
- If you choose to import a wallet, you will need to enter the seed phrase or private key associated with your wallet. Follow the prompts to complete the import process.
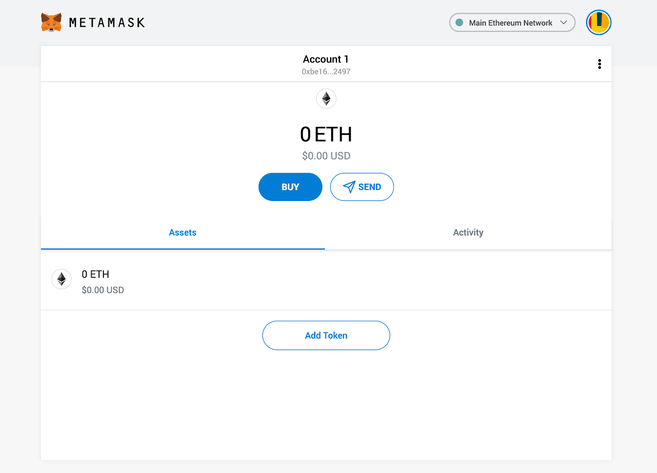
- Once you have imported or created a wallet, you will be connected to the Ethereum network by default. To connect to the Binance Smart Chain (BSC), click on the network dropdown on the top of the MetaMask interface and select “Custom RPC”.
- In the “Custom RPC” section, enter the following details to connect to the BSC network:
| Network Name | New RPC URL | Chain ID | Currency Symbol |
|---|---|---|---|
| Binance Smart Chain Mainnet | https://bsc-dataseed.binance.org/ | 56 | BNB |
Once you have entered the network details, click on “Save” to connect MetaMask to the Binance Smart Chain. You should now be able to see your BNB balance and interact with BSC-based decentralized applications (dApps) using MetaMask.
Setting up the MetaMask Wallet
Before you can add BNB to your MetaMask wallet, you need to set up the wallet itself. Follow these steps to connect MetaMask with Binance and add BNB to your wallet:
- Install MetaMask: If you haven’t already, install the MetaMask extension on your browser (Chrome, Firefox, or Brave).
- Create or Import a Wallet: Open MetaMask and either create a new wallet or import an existing one. Make sure to safely store the seed phrase or private key.
- Connect to Binance: In the MetaMask wallet, click on the network dropdown menu and select “Custom RPC.”
- Add Binance Network: Enter the following details to add the Binance Smart Chain network:
| Network Name: | Binance Smart Chain |
| RPC URL: | https://bsc-dataseed.binance.org/ |
| Chain ID: | 56 |
| Symbol: | BNB |
| Block Explorer URL: | https://bscscan.com/ |
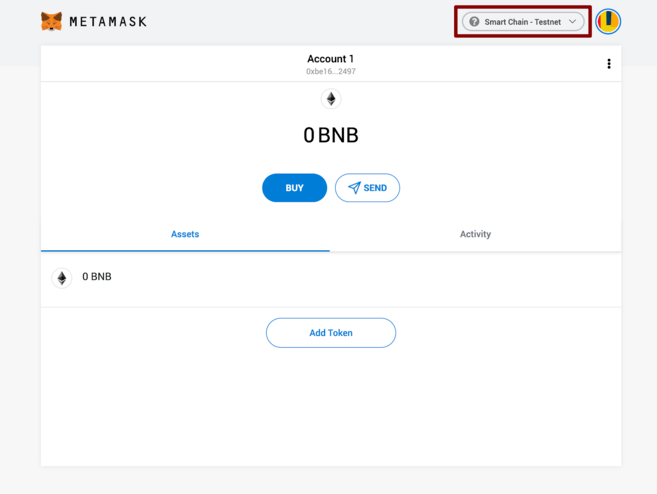
- Switch to Binance Network: After adding the Binance Smart Chain network, make sure to switch to it by selecting it from the network dropdown menu.
- Import BNB into MetaMask: To add BNB to your MetaMask wallet, you have two options:
- Add BNB with MetaMask: Click on the “Add Token” button in the MetaMask wallet and search for BNB. Then, follow the prompts to add BNB to your wallet.
- Import BNB with Wallet Address: If your BNB is stored in another wallet or exchange, you can import it into MetaMask by clicking on the “Import Token” button and entering the BNB contract address and decimal value (18 for BNB).
Once you’ve completed these steps, you should have successfully added BNB to your MetaMask wallet. You can now use your wallet to interact with Binance Smart Chain and participate in decentralized finance (DeFi) activities.
Understanding Binance Coin (BNB)
Binance Coin (BNB) is the native cryptocurrency of the Binance exchange, one of the largest and most popular cryptocurrency exchanges in the world. BNB was created by Binance to serve as a utility token within its ecosystem. It has a total supply of 200 million coins.
In-Wallet Support
Adding BNB to your wallet, such as MetaMask, allows you to easily manage and access your BNB holdings. The following steps will guide you on how to add BNB to MetaMask:
Step 1: Import or Create a Wallet
If you don’t have a MetaMask wallet, you first need to install the MetaMask browser extension and create a new wallet. If you already have a MetaMask wallet, you can skip to Step 2.
Step 2: Connect MetaMask to Binance
- Click on the MetaMask extension and select the network dropdown.
- Select “Custom RPC”.
- Enter the Binance Smart Chain network details:
- Network Name: Binance Smart Chain
- RPC URL: https://bsc-dataseed.binance.org/
- ChainID: 56
- Symbol: BNB
- Block Explorer URL: https://bscscan.com/
Step 3: Import BNB into MetaMask
- Access your Binance account and navigate to the wallet page.
- Find the BNB wallet address and copy it.
- Go back to MetaMask and click on the account dropdown.
- Select the option to “Import Account”.
- Paste the BNB wallet address into the input field.
- Click on “Import” to add the BNB wallet into MetaMask.
By following these steps, you will successfully connect and import BNB into your MetaMask wallet. You will then be able to manage and transact with BNB directly from within MetaMask, providing easy access to your Binance Coin holdings.
Finding your Binance Coin Wallet Address
When adding BNB to your MetaMask wallet, you will need to know your Binance Coin (BNB) wallet address. This address is used to import your BNB into MetaMask and connect it with your Binance account. Follow the steps below to find your Binance Coin wallet address:
- Log into your Binance account. If you don’t have an account, you will need to create one before proceeding.
- Once logged in, go to your Wallet page.
- Click on the “Deposit” button next to the Binance Coin (BNB) currency.
- This will take you to the BNB deposit page.
- Look for the “BNB Address” or “Deposit Address” field. This is your BNB wallet address. It is a long string of alphanumeric characters.
- You can either copy this address to your clipboard or use the provided QR code to import the address.
Once you have your BNB wallet address, you can proceed with adding it to MetaMask. This will allow you to include your BNB in your MetaMask wallet and use it to interact with decentralized applications (DApps) on the Ethereum network.
Adding BNB Token to MetaMask
If you want to add BNB, the native coin of the Binance platform, to your MetaMask wallet, you can do so by following a few simple steps:
- Open your MetaMask wallet: If you don’t have MetaMask installed, go to the official MetaMask website and download the extension for your browser.
- Import your BNB into MetaMask: To import BNB into your MetaMask wallet, you will need to have a Binance account and a small amount of BNB to cover the gas fees. Make sure you have the BNB address and private key from your Binance account.
- Click on the MetaMask extension in your browser and select the account you want to import the BNB into.
- Click on the account icon in the top right corner and select “Import Account”.
- Choose “Private Key” as the import type.
- Enter your BNB private key and click on the “Import” button.
- Your BNB will now be imported into your MetaMask wallet.
Congratulations! You have successfully added BNB to your MetaMask wallet. You can now use your BNB to participate in various DeFi protocols, decentralized exchanges, and other Ethereum-based applications that support BNB.
Importing BNB Private Key to MetaMask

MetaMask is a popular cryptocurrency wallet that allows users to connect with various decentralized applications (dApps) on the Ethereum blockchain. If you’re already using MetaMask and want to add your BNB (Binance Coin) to your wallet, you can easily import your BNB private key into MetaMask. Here are the steps to do so:
- Make sure you have both MetaMask and BNB in your possession. If you haven’t installed MetaMask yet, you can download and install it from the official website.
- Open MetaMask by clicking on the extension icon in your browser’s toolbar. If you don’t see the MetaMask icon, click on extensions (chrome://extensions/) and make sure it is enabled.
- Click on the MetaMask icon and select “import wallet” from the menu that appears.
- You will be prompted to enter your BNB private key into the provided field. Locate your BNB private key from your Binance account.
- Copy your BNB private key from Binance and paste it into the MetaMask’s import wallet field.
- Click on “import” to proceed. MetaMask will then import your BNB wallet, and you will be able to see your BNB balance in your MetaMask wallet.
By following these simple steps, you can add your BNB to MetaMask and enjoy the benefits of using MetaMask to interact with various Ethereum-based applications. Keep in mind that importing your BNB private key into MetaMask allows you to view and manage your BNB within the MetaMask wallet, but does not connect your MetaMask with your Binance account.
Connecting BNB with MetaMask
- Install the MetaMask extension in your web browser if you don’t have it already.
- Open MetaMask and click on the “Import Wallet” button to import your Binance account.
- Choose the option to import using a private key and enter your Binance private key. Make sure to keep your private key secure and never share it with anyone.
- Click on the “Import” button and MetaMask will import your Binance account into its wallet.
- After the import is successful, you will see your Binance account balance in MetaMask, along with your other Ethereum-based tokens.
- Now you can use MetaMask to connect to Binance’s network to interact with BNB and other Binance Smart Chain tokens. To do this, click on the network selection dropdown in the top right corner of MetaMask and select “Custom RPC”.
- In the “New RPC URL” field, enter the following URL: https://bsc-dataseed.binance.org/
- Click on “Save” and MetaMask will connect to the Binance Smart Chain network.
- You can now add BNB and other Binance Smart Chain tokens to your MetaMask wallet by clicking on the “Add Token” button and entering the token contract address.
- Once added, you will be able to see and manage your BNB and other Binance Smart Chain tokens directly from your MetaMask wallet.
By following these steps, you can import your BNB and connect it with MetaMask, allowing you to easily manage and interact with your BNB coins and other Binance Smart Chain tokens.
Sending BNB to MetaMask from Binance
If you want to use Binance Coin (BNB) in your MetaMask wallet, you will need to send it from your Binance account to your MetaMask wallet. The following steps will guide you through the process:
- First, make sure you have both a Binance account and MetaMask wallet. If you don’t have them yet, you will need to create one for each platform.
- Login to your Binance account and navigate to the BNB wallet. If you don’t have any BNB, you will need to first purchase it from the Binance platform.
- To initiate the withdrawal, you will need to click on the “Withdraw” button next to your BNB balance.
- In the withdrawal section, you will need to specify the BNB withdrawal address. This is the address of your MetaMask wallet. You can find your MetaMask wallet address by clicking on the account icon in the top right corner of the MetaMask extension and selecting “Copy Address to Clipboard”.
- Make sure to double-check the withdrawal address to avoid any errors. Once you have confirmed the address, enter the amount of BNB you wish to withdraw.
- After confirming the withdrawal details, click on the “Submit” button to complete the withdrawal request.
- Note that there may be a withdrawal fee imposed by Binance for transferring BNB out of the platform. Make sure to take this fee into account when specifying the withdrawal amount.
- Wait for the withdrawal to be processed by Binance. This could take a few minutes, depending on network congestion and other factors.
- Once the withdrawal is complete, you can now check your MetaMask wallet to see if the BNB has been successfully added.
By following these steps, you can easily add BNB from your Binance account into your MetaMask wallet and start using it for decentralized applications and transactions within the Ethereum network.
Checking BNB Balance in MetaMask
Once you have added BNB to your MetaMask wallet, you can easily check your BNB balance in a few simple steps:
- Open the MetaMask extension in your browser or launch the MetaMask mobile app.
- Connect your MetaMask wallet to the Binance Smart Chain network. To do this, click on the network selection button in the top center of the MetaMask interface. Then, select “Custom RPC” and enter the Binance Smart Chain network details.
- Import your BNB coin into your MetaMask wallet. This step is necessary if you have added BNB to your MetaMask wallet by importing it from another wallet or exchange.
- Once connected to the Binance Smart Chain network and your BNB coin is imported into MetaMask, you can now view your BNB balance.
- To check your BNB balance, navigate to the “Assets” or “Tokens” section in your MetaMask wallet.
- In the Assets or Tokens section, you should see a list of all the tokens you own, including BNB.
- Locate the BNB token and look for the balance associated with it. This balance represents the amount of BNB you currently hold in your MetaMask wallet.
Congratulations! You have successfully checked your BNB balance in MetaMask. Now you can keep track of your BNB holdings and manage your transactions with ease.
Using BNB in Decentralized Applications (dApps) with MetaMask
MetaMask is a popular browser extension wallet that allows users to interact with decentralized applications (dApps) on the Ethereum network. However, it is also possible to import the Binance Coin (BNB) into MetaMask and use it in dApps that support the Binance Smart Chain (BSC). This provides users with more options and flexibility when it comes to accessing and using dApps.
Importing BNB into MetaMask
- First, make sure you have MetaMask installed in your browser. If not, you can download and install it from the MetaMask website.
- Open MetaMask and click on the account icon in the top right corner to access the account menu.
- Select “Import Account” from the dropdown menu.
- In the import account window, click on the “Private Key” option.
- Next, you will need to obtain your Binance Smart Chain (BSC) wallet’s private key. This can be done by logging into your Binance account and going to the Wallet section. From there, you can find your BSC wallet and obtain the private key.
- Copy the BSC wallet’s private key.
- Back in the MetaMask import account window, paste the BSC wallet’s private key into the input field.
- Click on the “Import” button to import the BNB wallet into MetaMask.
- You will now see your BNB wallet listed under your MetaMask accounts.
Using BNB in dApps with MetaMask
Once you have imported your BNB wallet into MetaMask, you can use it in dApps that support the Binance Smart Chain. Here’s how:
- Connect MetaMask to the Binance Smart Chain. Open MetaMask and click on the network dropdown in the top center of the screen. Select “Custom RPC” and enter the Binance Smart Chain RPC URL. The RPC URL can be found on the Binance Chain website.
- Add BNB to your MetaMask account. Open MetaMask and click on the account icon in the top right corner. From the dropdown menu, select your BNB wallet. In the account view, click on the “Add Token” button and search for BNB. Click on the “Add” button to add BNB to your MetaMask account.
- Now you can use BNB in dApps that support the Binance Smart Chain. Simply select your BNB wallet in MetaMask before interacting with a BSC-based dApp.
By following these steps, you can import and use BNB in decentralized applications with MetaMask. This opens up a whole new world of possibilities for users who want to access and utilize BNB in various dApps on the Binance Smart Chain.
Troubleshooting Common Issues when Adding BNB to MetaMask
If you are experiencing difficulties when adding BNB (Binance coin) to your MetaMask wallet, follow the steps below to troubleshoot and overcome common issues.
1. Ensure you have the latest version of MetaMask:
Make sure that you are using the most recent version of the MetaMask wallet. Outdated versions may have compatibility issues with adding BNB.
2. Connect MetaMask to Binance:
To add BNB to MetaMask, you need to connect your MetaMask wallet to Binance. Follow these steps:
- Open your MetaMask wallet.
- Click on the account icon in the top right corner.
- Select “Settings” from the dropdown menu.
- Go to the “Networks” tab.
- Click on “Add Network”.
- Enter the following details:
- Network Name: Binance Smart Chain
- New RPC URL: https://bsc-dataseed.binance.org/
- Chain ID: 56
- Symbol: BNB
- Block Explorer URL: https://bscscan.com
- Click “Save”.
- Your MetaMask wallet should now be connected to Binance Smart Chain.
3. Import BNB into MetaMask:

If you already have BNB stored in an external wallet or exchange, you can import it into MetaMask by following these steps:
- Open your MetaMask wallet.
- Click on the account icon in the top right corner.
- Select “Import Account” from the dropdown menu.
- Enter the wallet’s private key or keystore file and password.
- Click “Import”.
- Your BNB should now be imported into your MetaMask wallet.
4. Check for Sufficient Gas Funds:
When adding BNB to MetaMask, you need to have sufficient gas funds to cover the transaction fees. If you are encountering errors or failed transactions, make sure you have enough BNB for gas fees.
5. Refresh MetaMask:
If you encounter any issues after completing the steps above, try refreshing your MetaMask wallet. Sometimes a simple refresh can resolve connectivity or synchronization issues.
By following these troubleshooting steps, you should be able to successfully add BNB to your MetaMask wallet and start utilizing the benefits of this popular coin.
Frequently asked questions:
Can I add BNB to my MetaMask wallet?
Yes, you can add BNB to your MetaMask wallet. The process is quite simple and involves adding the Binance Smart Chain network to your MetaMask and then adding the BNB token.
What is the first step to connect BNB with MetaMask?
The first step to connect BNB with MetaMask is to add the Binance Smart Chain network to your MetaMask wallet. This can be done by accessing the network settings on MetaMask and adding the BNB network as a custom network.
How do I add BNB to my MetaMask wallet?
To add BNB to your MetaMask wallet, you need to follow these steps: 1. Open your MetaMask wallet and click on the network selection button. 2. Select the Binance Smart Chain network from the dropdown menu. 3. Click on “Add Token” and paste the BNB contract address. 4. Click on “Next” and then “Add Tokens” to complete the process.
Are there any fees involved in adding BNB to MetaMask?
Yes, there may be fees involved in adding BNB to MetaMask. These fees include gas fees for interacting with the Binance Smart Chain network and any transaction fees required for adding the BNB token to your wallet.
Can I import BNB into my MetaMask wallet?
No, you cannot directly import BNB into your MetaMask wallet. However, you can add the Binance Smart Chain network to MetaMask and then add the BNB token to your wallet by following the steps mentioned in the previous answers.
Videos:
The Easiest Way to Deposit BNB Into Metamask Wallet (ALL STEPS)
How to Send BNB To Metamask | Simple Step-by-Step Tutorial
How long does it usually take for the BNB to be added to MetaMask after following these steps?
Hi JohnSmith01, after following these steps, it usually takes a few minutes for the BNB to be added to your MetaMask wallet. However, please keep in mind that the transaction speed may vary depending on the network congestion. Make sure you have a stable internet connection and be patient while the process completes. If you encounter any issues, feel free to ask for further assistance. Happy adding!
This guide was extremely helpful! I followed the steps and managed to add BNB to my MetaMask wallet without any issues. Now I can easily manage and use my BNB coins. Thank you for providing such clear instructions!
Hi everyone! I just followed this step-by-step guide to add BNB to my MetaMask wallet, and it worked perfectly. Now I can easily manage and use my BNB coins within the MetaMask ecosystem. Thanks for the clear instructions!
Can I add BNB to MetaMask even if I don’t have a Binance Coin?
Yes, you can add BNB to MetaMask even if you don’t have a Binance Coin. Follow the steps outlined in the article to connect BNB with MetaMask and include BNB in your MetaMask wallet. It’s a great way to easily manage and use your BNB coins within the MetaMask ecosystem.
Can I add BNB to MetaMask if I don’t have a MetaMask wallet yet?
Yes, you can add BNB to MetaMask even if you don’t have a MetaMask wallet yet. Just follow the steps in the article and make sure to download and install MetaMask from the official website before starting the process.
Great article! I followed the instructions and successfully added my BNB to MetaMask. Now I can easily manage and use my BNB coins. Thank you for the step-by-step guide!
I had no idea how to add BNB to MetaMask until I found this guide. The step-by-step instructions were really helpful and easy to follow. Now I can easily manage and use my BNB coins. Thanks!
This guide is really helpful! I followed the steps and successfully added BNB to my MetaMask wallet. Now I can easily manage and use my BNB coins. Thanks for sharing!
This guide is very helpful. I followed the steps and successfully added BNB to my MetaMask wallet. Now I can easily manage and use my BNB coins within the MetaMask ecosystem. Thank you!
Can I use this guide to add BNB to MetaMask if I have a different wallet installed?
Yes, you can use this guide to add BNB to MetaMask even if you have a different wallet installed. The steps mentioned in the guide are specific to MetaMask and do not depend on the wallet you currently have. Follow the step-by-step instructions to successfully add BNB to your MetaMask wallet.
This guide was really helpful! I followed the steps and successfully added BNB to my MetaMask wallet. Now I can easily manage and use my BNB coins within the MetaMask ecosystem. Thanks for the clear instructions!
I followed these steps and successfully added BNB to my MetaMask wallet. It’s great to have easy access to my Binance Coin within MetaMask!
How long does it usually take for the BNB to be added to the MetaMask wallet after following these steps?
Usually, it takes a few minutes for the BNB to be added to the MetaMask wallet after following these steps.
Thanks for providing this step-by-step guide! I just added BNB to my MetaMask wallet without any issues. It’s great to have all my coins in one place.
Great guide! I followed these steps and successfully added BNB to my MetaMask wallet. Now I can easily manage and use my BNB coins. Thanks for sharing!
This guide was super helpful! I’ve been wanting to add my BNB to my MetaMask wallet and this step-by-step instructions made it a breeze. Thanks for sharing!
The step-by-step guide is very helpful. I followed the instructions and successfully added BNB to my MetaMask wallet. Now I can easily manage my Binance Coin within the MetaMask ecosystem. Thanks for this guide!
This guide is so helpful! I’ve been trying to figure out how to add BNB to my MetaMask wallet for a while now. The step-by-step instructions make it really easy to follow. Thank you!
Thanks for the step-by-step guide! I followed the instructions and was able to successfully add BNB to my MetaMask wallet. Now I can easily manage and use my BNB coins within the MetaMask ecosystem. Great article!
This guide is very helpful. I followed the steps and successfully added BNB to my MetaMask wallet. Now I can easily manage my BNB coins within the MetaMask ecosystem. Thank you!
This guide is so helpful! I was able to easily add my BNB to MetaMask using these step-by-step instructions. Thank you!
This guide was very helpful! I followed the steps and successfully added BNB to my MetaMask wallet. Now I can easily manage and use my BNB coins within the MetaMask ecosystem. Thanks!
Can I add BNB to MetaMask if I’m a new user?
Yes, you can add BNB to MetaMask even if you’re a new user. Just follow the step-by-step guide in the article and you’ll be able to import BNB into your MetaMask wallet. Don’t forget to first install and set up your MetaMask wallet before proceeding. Happy trading!
It’s great to see a step-by-step guide like this! Adding BNB to MetaMask has never been easier. I followed the instructions and now I can easily manage and use my BNB coins within the MetaMask ecosystem. Thank you!
How long does it usually take to import BNB into MetaMask? I’m interested in trying it out!
Hey JohnDoe123! Imported the BNB into MetaMask usually takes just a few minutes. Once you have entered the BNB token contract address and clicked on “Add Token”, MetaMask will automatically fetch the token details and you should see your BNB balance updated in your wallet. Give it a try! Let me know if you have any other questions.
Thanks for the step-by-step guide! I’ve been wanting to add BNB to my MetaMask wallet and now I know exactly how to do it.
I followed these steps and successfully added BNB to my MetaMask wallet. It was a straightforward process and now I can easily manage my Binance Coins within the MetaMask ecosystem. Thanks for the clear instructions!
This guide was extremely helpful! I followed the steps and successfully added BNB to my MetaMask wallet. Now I can easily manage and use my BNB coins. Thank you!
Thanks for the clear and detailed steps! I was able to add BNB to my MetaMask wallet without any issues. Keep up the good work!
This guide is very helpful! I followed the steps and successfully added BNB to my MetaMask wallet. Now I can easily manage and use my BNB coins within the MetaMask ecosystem. Thank you for sharing!
Thanks for the step-by-step guide! I followed the instructions and successfully added BNB to my MetaMask wallet. Now I can easily manage my BNB coins within the MetaMask ecosystem. This was really helpful!
Thanks for the detailed guide! I’ve been wanting to add BNB to my MetaMask wallet for a while now, and this step-by-step process makes it so much easier. Can’t wait to start managing my BNB coins within the MetaMask ecosystem!
Such a helpful guide! I’ve been trying to add BNB to my MetaMask wallet for a while now and this step-by-step tutorial made it so easy. Thank you!
I recently added BNB to my MetaMask wallet by following this guide. It was really helpful and easy to understand. Now I can conveniently manage and use my BNB coins within MetaMask. Thank you!
This guide was incredibly helpful! I followed the steps and successfully added BNB to my Metamask wallet. Now I can easily manage and use my BNB coins. Thank you!
Wow, this step-by-step guide on adding BNB to MetaMask is amazing! I’ve been wanting to include my Binance Coin in my MetaMask wallet for a while now, and this guide makes it so easy. Thanks for the clear instructions!
How long does it usually take for the BNB to be added to MetaMask after following these steps?
It typically takes a few minutes for the BNB to be added to MetaMask after following these steps. However, the exact time may vary depending on network congestion. If you have followed the steps correctly, the BNB should appear in your MetaMask wallet shortly. Happy trading!
Thanks for the detailed guide! I’ve been wanting to add my BNB to MetaMask and now I know exactly how to do it. Can’t wait to start managing my BNB coins within the MetaMask ecosystem.
This guide was really helpful! I followed every step and successfully added BNB to my MetaMask wallet. Now I can easily manage and use my BNB coins within the MetaMask ecosystem. Thank you!
I followed this guide and successfully added BNB to my MetaMask wallet. It was a straightforward process and now I can easily manage and use my BNB within the MetaMask ecosystem. Thanks for the step-by-step instructions!
Is it possible to add BNB to MetaMask if I don’t have a MetaMask wallet installed?
No, you need to have a MetaMask wallet installed before you can add BNB to it. Make sure to download and install MetaMask from the official website, and then you can follow the step-by-step guide to add BNB to your MetaMask wallet.
Great guide! I followed the steps and was able to easily add my BNB to MetaMask. Now I can manage and use my BNB coins seamlessly within the MetaMask ecosystem. Thanks for the clear instructions!
This guide was extremely helpful! I followed the steps and successfully added BNB to my MetaMask wallet. Now I can easily manage and use my BNB coins within the MetaMask ecosystem. Thank you for the clear instructions!
How safe is it to add BNB to MetaMask? Are there any risks involved?
Adding BNB to MetaMask is a safe process as long as you follow the correct steps and ensure the authenticity of the sources. However, it’s important to note that, like any financial transaction, there are always risks involved. Make sure to double-check the contract addresses and URLs before proceeding, and consider doing thorough research on the process to mitigate any potential risks. Stay safe!
This is a great guide! I followed the steps and successfully added BNB to my MetaMask wallet. Now I can easily manage and use my BNB coins within the MetaMask ecosystem. Thank you!
I recently added BNB to my MetaMask wallet following these steps and it worked flawlessly! Now I can easily manage and use my BNB coins within the MetaMask ecosystem. Thank you for the clear and easy-to-follow guide!
This guide was really helpful! I followed the steps and successfully added BNB to my MetaMask wallet. Now I can easily manage and use my BNB coins. Thank you!
This guide is extremely helpful! I successfully added BNB to my MetaMask wallet following these steps. Now I can easily manage and use my BNB coins within the MetaMask ecosystem. Thank you for the clear instructions!
Is it safe to add BNB to MetaMask? I don’t want to risk losing my coins.
Adding BNB to MetaMask is completely safe. Your coins are not at risk as long as you follow the step-by-step guide provided in the article. Make sure to double-check the contract address and the network settings to ensure a secure connection. Happy adding!
This guide is really helpful! I followed the steps and successfully added BNB to my MetaMask wallet. Now I can easily manage and use my BNB coins. Thank you!
Can I add BNB to MetaMask even if I don’t have a Binance account?
Yes, you can add BNB to MetaMask even if you don’t have a Binance account. Adding BNB to MetaMask allows you to easily manage and use your BNB coins within the MetaMask ecosystem. Just follow the step-by-step guide mentioned in the article, and you’ll be able to add BNB to your MetaMask wallet hassle-free. Happy trading!
Adding BNB to MetaMask was a breeze with this step-by-step guide! Now I can conveniently manage and use my BNB coins within MetaMask. Thank you!
I followed these steps and successfully added BNB to my MetaMask wallet. It’s great to have easy access to my Binance Coin now!
Can I add BNB to MetaMask if I don’t have a Binance Coin (BNB) holder?
Yes, you can still add BNB to MetaMask even if you don’t currently hold any Binance Coin. Simply follow the steps outlined in the guide to connect BNB with your MetaMask wallet. Enjoy managing your digital assets!
Is it safe to add BNB to MetaMask? How secure is the process?
Adding BNB to MetaMask is safe as long as you follow the correct steps mentioned in the guide. The process is secure if you ensure you are entering the correct details like the contract address. Always double-check before proceeding!
Adding BNB to MetaMask was so easy with this step-by-step guide! I’m now able to manage my Binance Coin seamlessly within MetaMask. Thank you for the clear instructions!
Adding BNB to MetaMask was so seamless with this step-by-step guide! As a BNB holder, I was able to easily follow the instructions provided and now I can manage my coins within the MetaMask ecosystem effortlessly. Thank you for this helpful tutorial!
Is it necessary to have a significant amount of BNB to make it worthwhile to add it to MetaMask, or can even a small balance be easily managed within the wallet?
Hey Ella_89, you don’t need a significant amount of BNB to add it to MetaMask. Even a small balance can be easily managed within the wallet. Adding BNB to MetaMask gives you more control and flexibility in managing your BNB coins. Enjoy integrating BNB into your MetaMask wallet!
Adding BNB to MetaMask was so easy with this step-by-step guide! I love how smoothly I can now manage my BNB coins within the MetaMask ecosystem. Thank you for the clear instructions!
Adding BNB to MetaMask was so easy following this guide! I appreciate the step-by-step instructions.
Adding BNB to MetaMask was so much easier than I expected! The step-by-step guide really helped me connect my BNB with MetaMask seamlessly. Now I can easily manage and use my BNB coins within the MetaMask ecosystem. Thanks for the detailed instructions!
Adding BNB to MetaMask was a breeze following this step-by-step guide! It’s great to now have my Binance Coin easily accessible within MetaMask. Definitely recommend it to all BNB holders.
Adding BNB to MetaMask was so much easier than I thought! I followed the step-by-step guide and now I can easily manage my BNB coins. Thanks for the clear instructions!
Thank you for sharing this detailed guide on adding BNB to MetaMask! I followed the steps and successfully imported my Binance Coin. It’s great to have all my coins in one place within the MetaMask wallet.
Adding BNB to MetaMask seems like a straightforward process based on this guide. I appreciate the step-by-step instructions provided here, making it easy for BNB holders like myself to integrate it into MetaMask. Looking forward to managing my BNB coins seamlessly in the MetaMask ecosystem!
Adding BNB to MetaMask was so easy with this guide! I appreciate the step-by-step instructions that made the process smooth and hassle-free. Now I can manage my Binance Coin seamlessly within the MetaMask ecosystem.
Adding Binance Coin (BNB) to MetaMask was a breeze with this step-by-step guide. The instructions were clear and easy to follow, making it simple to include my BNB in the MetaMask wallet. Thanks for the helpful guide!
Adding BNB to MetaMask was easier than I thought! I followed the step-by-step guide and now I can easily manage all my BNB coins. Thank you for the clear instructions!
Adding BNB to MetaMask was so simple and straightforward with this step-by-step guide! Thank you for the clear instructions on connecting my Binance Coin to my MetaMask wallet.
Thank you for the detailed guide on adding BNB to MetaMask. It’s really helpful for BNB holders like me who want to manage their coins conveniently within the MetaMask ecosystem.
Adding BNB to MetaMask was such a breeze with this step-by-step guide! I followed the instructions and now I can easily manage my BNB coins in MetaMask. Definitely recommend it to all BNB holders out there!
Adding BNB to MetaMask was so much easier than I expected! I followed the step-by-step guide, and now I can manage my BNB easily within the MetaMask ecosystem. Thank you for the clear instructions!
How do I make sure that my BNB coins are secure when adding them to MetaMask? Are there any additional security measures to take?
To ensure the security of your BNB coins when adding them to MetaMask, it’s essential to follow best practices. Make sure to never share your seed phrase or private keys with anyone. Additionally, enable two-factor authentication on your MetaMask account for an extra layer of security. By taking these precautions, you can enhance the security of your BNB coins in MetaMask.
How secure is it to add BNB to MetaMask? Any risks involved in importing Binance Coin into the MetaMask wallet?
Adding BNB to MetaMask can be secure if you follow the recommended steps correctly. Ensure you input the correct token contract address for Binance Smart Chain to avoid risks. It’s essential to verify the authenticity of the address before importing Binance Coin into your MetaMask wallet. Stay cautious and double-check all details to keep your assets safe.
I found this step-by-step guide very helpful in adding BNB to my MetaMask wallet. It’s straightforward and easy to follow. Now I can easily manage my BNB coins within MetaMask. Thanks for the clear instructions!
Adding BNB to MetaMask was a breeze with this step-by-step guide! I appreciate how clear and concise the instructions were in integrating BNB with MetaMask. Now I can manage my BNB coins effortlessly within the MetaMask ecosystem. Thank you for making it so easy!
Can you clarify how adding BNB to MetaMask affects the security of my tokens? I want to ensure my assets are safe. Thank you.
When you add BNB to MetaMask, it doesn’t compromise the security of your tokens. MetaMask is a secure wallet that allows you to manage various cryptocurrencies, including BNB, within its ecosystem. Just make sure to follow best practices for keeping your seed phrase and private keys secure to safeguard your assets. Happy trading!
Adding BNB to MetaMask was easier than I thought! The step-by-step guide was clear and straightforward, making the whole process smooth and efficient. Now I can manage my BNB coins within MetaMask hassle-free. Thanks for the helpful instructions!
Adding BNB to MetaMask was a breeze with this guide! I love how easy it is to manage my BNB coins now within the MetaMask ecosystem. Can’t wait to explore more features with BNB on MetaMask!
Can someone clarify the process of connecting MetaMask to Binance in more detail? I’m a bit confused about the network settings. Thanks!
Sure, I can help with that! To connect your MetaMask to Binance, follow these steps carefully. First, open MetaMask and log in to your account. Then, click on the account icon in the top right corner and select “Settings”. Scroll down and click on “Networks”. Next, click on “Add Network” and enter the details for the Binance Smart Chain network. Once you have done that, you can import BNB into your MetaMask by adding the custom token with the BNB contract address. Hope this clarifies things for you!
As a BNB holder, I’ve been wanting to add it to my MetaMask wallet for a while now. This step-by-step guide makes the process so clear and easy to follow. Thank you for the detailed instructions!
Adding BNB to MetaMask was easier than I expected! The step-by-step guide was very clear and helpful. I now feel more confident managing my BNB coins within MetaMask. Thank you for the thorough instructions!
Adding BNB to MetaMask was so easy with this clear step-by-step guide! I appreciate the detailed instructions that helped me connect my Binance Coin to MetaMask seamlessly. Now I can manage and use my BNB coins conveniently within the MetaMask ecosystem. Thanks for this helpful tutorial!
Could you clarify if I need to have some BNB in my Binance account before adding it to MetaMask, or will the guide help me do that as well?
Hi Emily1990, you don’t need to have any BNB in your Binance account before adding it to MetaMask. The guide will walk you through the process of connecting your MetaMask wallet to Binance Smart Chain and adding BNB. Just follow the steps outlined, and you’ll be able to import and manage your BNB within MetaMask seamlessly. If you encounter any issues, feel free to ask for further assistance!
As a loyal Binance Coin holder, I’m thrilled to finally be able to seamlessly integrate BNB into my MetaMask wallet. The step-by-step guide provided here makes the process incredibly straightforward, allowing me to effortlessly manage and utilize my BNB within the MetaMask ecosystem. Kudos to the team for simplifying this integration!
Thanks for the detailed guide! I’ve been looking for a clear explanation on how to add BNB to my MetaMask wallet. Can’t wait to try it out!
Is it possible to add other cryptocurrencies besides BNB to MetaMask following a similar process?
Yes, you can add other cryptocurrencies to MetaMask following a similar process. Simply obtain the token contract address for the cryptocurrency you want to add, and then use the ‘Add Token’ function in MetaMask to include it in your wallet. Make sure the network settings match the blockchain of the cryptocurrency you are adding.
Adding BNB to MetaMask was so easy with this guide! I appreciate the step-by-step instructions provided. Can’t wait to start managing my BNB coins within the MetaMask ecosystem. Thanks for the help!
Adding BNB to MetaMask was so easy with this step-by-step guide! I followed the instructions and now I can manage my BNB coins seamlessly in my MetaMask wallet. Thank you for the clear and concise tutorial!
Adding BNB to MetaMask was so easy with this step-by-step guide! I followed the instructions and now I can manage my BNB coins seamlessly in my MetaMask wallet. Thank you for sharing this helpful information!
Thanks for the detailed guide on adding BNB to MetaMask! It’s really helpful for those of us who are new to managing Binance Coin in MetaMask. I appreciate the step-by-step instructions and clear explanations provided in the article.
Thanks for the detailed guide! I followed the steps and successfully added my BNB to MetaMask. Now I can easily manage my Binance Coins within the MetaMask ecosystem. Great job explaining each step!
Adding BNB to MetaMask was incredibly simple following this guide. I just connected MetaMask to Binance Smart Chain and imported BNB into my wallet. Now I can easily manage and use my BNB coins. Thanks for the detailed instructions!
Thank you for the detailed guide on adding BNB to MetaMask. I’ve been wanting to include my Binance Coin in my MetaMask wallet and your step-by-step instructions made it a breeze. Can’t wait to start managing my BNB within the MetaMask ecosystem!
Adding BNB to MetaMask was so straightforward with this guide! I appreciate the clear instructions provided here. Now I can easily manage and use my BNB coins within the MetaMask ecosystem. Thank you for the helpful steps!
Adding BNB to MetaMask was so simple and straightforward with this guide! It’s great to finally have all my coins in one place and easily accessible within MetaMask.
Great guide! I followed all the steps, but I’m having trouble connecting my MetaMask to the Binance Smart Chain. Has anyone else experienced this issue?
Hi Jessica! I had the same issue when I first tried connecting. Make sure you’re using the correct RPC URL and that your browser extensions are not blocking anything. Restarting the browser sometimes helps too. Good luck!
Thanks for the guide! I’m new to cryptocurrencies. Do I need to transfer BNB from an exchange to my MetaMask wallet after adding the network?
You’re welcome, Emily! Yes, after adding the Binance Smart Chain to your MetaMask, you’ll need to transfer your BNB from the exchange to your MetaMask wallet. Just make sure to copy your wallet address correctly before making the transfer. Good luck!
Thanks for the guide! I want to make sure that I’m entering the correct token contract address. Is there a way to double-check the BNB token contract address before I proceed with the import?
Hey JessicaH92, you’re welcome! To double-check the BNB token contract address, you can visit the official Binance Smart Chain documentation or use trusted resources like BSCScan. Just search for BNB there, and you should find the correct contract address. Better safe than sorry!
I found this guide incredibly helpful! I was a bit confused about adding BNB to my MetaMask wallet, but the step-by-step instructions made it super easy. I would recommend it to anyone who wants to manage their Binance Coin effectively. Thanks for the clear directions!
I just followed this guide to add BNB to my MetaMask, and it was super straightforward! The steps were easy to understand, and my BNB is now safely in my wallet. Thanks for the clear instructions!
Thanks for the guide! Can you explain what the “Chain ID” is and why it’s necessary for adding BNB to MetaMask?
Sure, Jessica! The “Chain ID” is crucial because it uniquely identifies the blockchain network you are connecting to, in this case, Binance Smart Chain. It ensures that your MetaMask is interacting with the correct network, allowing you to manage your BNB without issues. If you use the wrong Chain ID, your transactions may not be processed correctly. Happy to help!
I just added BNB to my MetaMask wallet following this guide, and it was super easy! The step-by-step instructions are clear and helpful. Definitely recommend for anyone who holds BNB!
I just added BNB to my MetaMask wallet using this guide, and it worked perfectly! The steps were straightforward and really easy to follow. I appreciate how clear the instructions were, especially for someone who’s new to crypto. Highly recommend this method!
I just added BNB to my MetaMask wallet using this guide, and it couldn’t have been easier! The steps are straightforward and the links provided were super helpful. Highly recommend it for anyone looking to manage their BNB coins with ease!
Thanks for the guide! Can you explain what the Chain ID is used for in the process of adding BNB to MetaMask?
Sure, EmmaWaves! The Chain ID is crucial because it uniquely identifies the blockchain you are interacting with. In this case, for Binance Smart Chain, the Chain ID is 56. It helps prevent any cross-chain transaction errors and ensures that your MetaMask wallet is communicating with the right network. Let me know if you have any more questions!
I just added BNB to my MetaMask wallet using this guide, and it was super straightforward! The detailed steps made it easy to follow. Thanks for sharing the RPC details; they were crucial. Now I can manage my BNB easily!
I recently added BNB to my MetaMask wallet using this guide, and it was super straightforward! The step-by-step instructions made the process really easy to follow. I love how I can now manage my Binance Coin seamlessly within the MetaMask ecosystem. Highly recommend this for anyone looking to do the same!
Thanks for the guide! I’m wondering if there’s a way to avoid fees when transferring BNB to my MetaMask wallet?
Hello Emily! While it’s tough to completely avoid fees when transferring BNB, you can minimize them by choosing the right time to transfer, as gas fees can vary based on network congestion. Additionally, consider using Binance’s BNB to pay for fees as it offers a discount. Hope this helps!
Great article! I’m new to using MetaMask, and I was wondering if there’s an easy way to track my BNB balance within the wallet after I add it. Any tips?
Hi Jessica! Welcome to the world of MetaMask! Once you add BNB to your wallet, you can view your balance right in the main interface. Just make sure you select the Binance Smart Chain network to see your BNB. If you want more detailed tracking, consider using a blockchain explorer like BscScan to monitor your transactions and balance easily. Happy stacking!
I’ve been using MetaMask for a while now, and adding BNB was a breeze! The instructions were clear and easy to follow. I’m excited to manage my Binance Coin right alongside my other tokens. Great guide!
Great guide! I followed your steps, but I’m still confused about where to find the BNB token contract address. Can you clarify where to locate it?