Metamask is a popular cryptocurrency wallet that allows users to interact with decentralized applications (dApps) on the Ethereum blockchain. If you’re new to Metamask and want to learn how to use it, this step-by-step guide will provide you with instructions on how to download, install, and utilize this powerful tool.
Metamask can be installed as a browser extension for Chrome, Firefox, or Brave. Once installed, you can easily use Metamask to manage your Ethereum wallets, securely send and receive Ether, as well as interact with various dApps and decentralized finance (DeFi) platforms.
To guide you through the usage of Metamask, we’ll cover topics such as creating a new wallet, importing an existing wallet, managing multiple accounts, and setting up custom networks. Additionally, we’ll discuss the importance of keeping your wallet secure by backing up your seed phrase.
By the end of this guide, you’ll have a solid understanding of how to utilize Metamask to navigate the world of cryptocurrencies and decentralized applications. Whether you’re an experienced Ethereum user or just getting started, Metamask will be an invaluable tool in your blockchain journey.
Setting up Metamask account
Metamask is a widely used Ethereum wallet that allows users to interact with decentralized applications (dApps) on the Ethereum blockchain. Setting up a Metamask account is a simple process that involves the following steps:
- Install the Metamask extension: To start using Metamask, you need to add the extension to your web browser. Metamask is available for Chrome, Firefox, Brave, and Edge. Simply visit the respective browser extension stores and search for “Metamask”. Click on the “Install” button to add it to your browser.
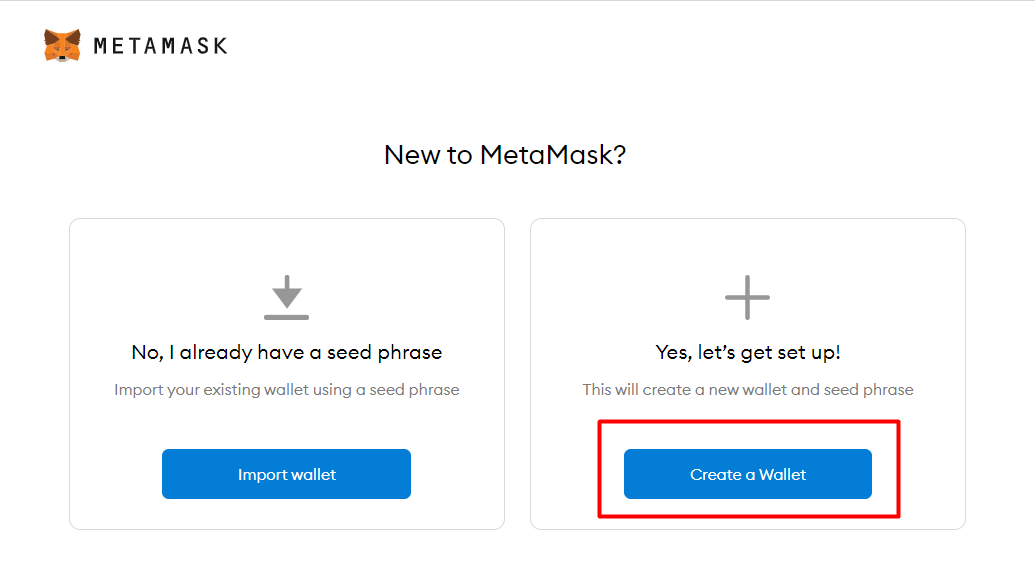
- Create a new Metamask account: Once installed, you can open Metamask by clicking on the extension icon in your browser’s toolbar. On the Metamask homepage, click on the “Get Started” button to begin creating a new account.
- Set up a strong password: Choose a strong password that is unique and not used for other online accounts. Make sure to follow the instructions provided to ensure the security of your account.
- Save your seed phrase: Metamask will generate a unique seed phrase consisting of 12 words. This phrase is your backup in case you forget your password or lose access to your device. It is crucial to write down these words and store them in a safe place. Do not share this seed phrase with anyone!
- Confirm your seed phrase: To verify that you have saved your seed phrase correctly, Metamask will ask you to select the words in the correct order. This step ensures that you have a valid backup.
- Choose a suitable network: Metamask allows you to connect to different Ethereum networks. By default, it will connect to the Ethereum mainnet, but you can also utilize other networks such as the testnets for development purposes. Choose the network that suits your needs.
- Agree to terms of service: Read and agree to the terms of service and privacy policy of Metamask.
Congratulations! You have successfully set up your Metamask account. Now you can use Metamask to securely store, send, and receive Ethereum and interact with various decentralized applications on the Ethereum blockchain.
Installing Metamask extension
Metamask is a cryptocurrency wallet and browser extension that allows users to interact with Ethereum-based distributed applications (dApps) directly from their web browser. In order to start using Metamask, it is necessary to install the Metamask extension in your preferred browser.
Instructions
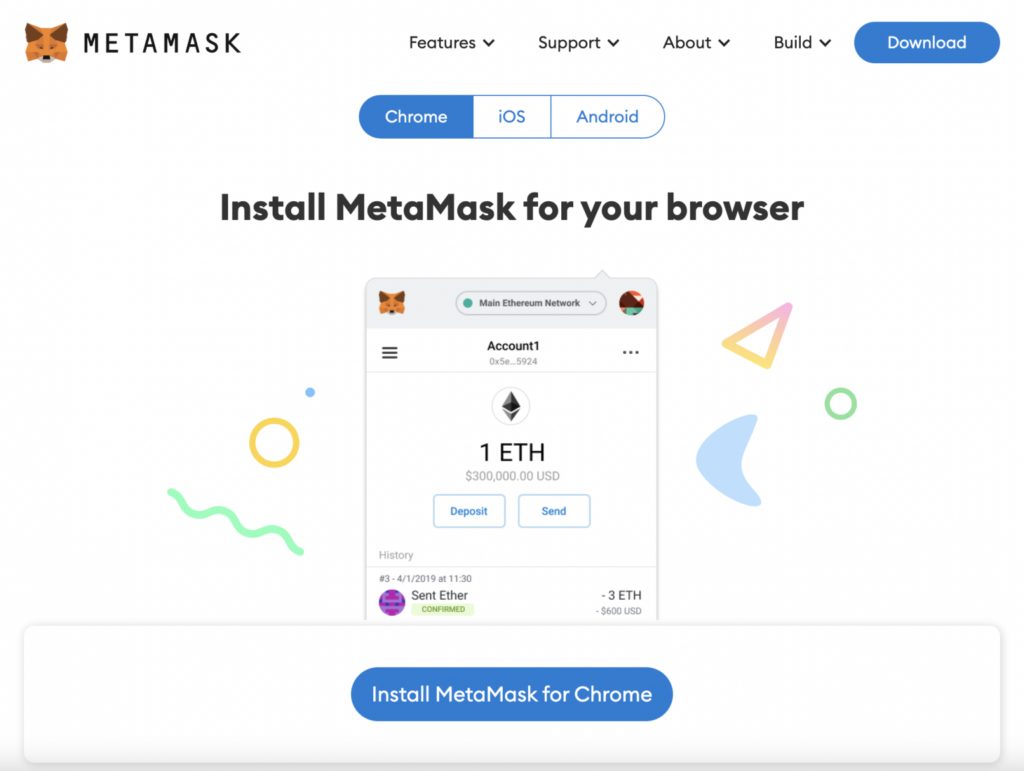
- Open your web browser and go to the official Metamask website.
- Click on the “Get Chrome Extension” or “Get Firefox Extension” button, depending on your browser.
- A new tab will open in your browser, redirecting you to the appropriate extension page in the Chrome Web Store or Firefox Add-ons Marketplace.
- Click on the “Add to Chrome” or “Add to Firefox” button.
- Confirm the installation by clicking “Add extension” when prompted.
- The Metamask extension will start installing on your browser.
- Once the installation is complete, the Metamask icon will appear in your browser’s toolbar.
Usage
To utilize Metamask, you can simply click on the Metamask icon in your browser’s toolbar. This will open the Metamask extension, where you can create a new wallet, import an existing wallet, or connect to a hardware wallet. Once your wallet is set up, you can use Metamask to interact with various Ethereum-based dApps by approving transactions and managing your cryptocurrency assets.
Metamask Guide: How to use Metamask
If you are new to Metamask and want to learn how to use it effectively, you can refer to our comprehensive guide on how to use Metamask. This guide will walk you through the process of setting up Metamask, managing your wallets, securely storing your private keys, and using Metamask with different dApps to access various blockchain-based services.
Creating a new wallet in Metamask
Metamask is a browser extension that allows you to interact with the Ethereum blockchain. It is a powerful tool for managing your digital assets and decentralized applications. In order to use Metamask, you need to create a new wallet. Follow the instructions below to create a new wallet in Metamask:
- Download and install the Metamask extension for your preferred browser.
- Click on the Metamask icon in your browser toolbar to open the extension.
- Click on the “Get Started” button to begin.
- Read and accept the terms of use.
- Choose a strong password for your wallet and click “Create”.
- Metamask will generate a unique 12-word seed phrase. Write down this seed phrase and store it in a safe place. This seed phrase can be used to recover your wallet if you lose access to your device.
- Confirm the seed phrase by selecting the words in the correct order.
- Once you have confirmed the seed phrase, your wallet will be created.
- Set a password for your newly created wallet and click “Confirm”.
Congratulations! You have successfully created a new wallet in Metamask. You can now start utilizing Metamask to interact with decentralized applications and manage your digital assets on the Ethereum blockchain. Make sure to keep your seed phrase and wallet password safe and secure.
Importing an existing wallet to Metamask
If you already have a wallet and want to use it with Metamask, you can easily import it into the extension. Below are the instructions to import an existing wallet to Metamask:
- Open the Metamask extension in your browser. If you don’t have it installed, you can find it in the extension store and install it.
- Click on the Metamask icon in your browser’s toolbar to open the extension.
- On the Metamask home screen, click on the “Import Wallet” button.
- You will be presented with two options: “Import using seed phrase” or “Import using private key”.
- If you have a seed phrase (also known as a recovery phrase) for your existing wallet, select the “Import using seed phrase” option.
- Enter your seed phrase in the designated input field and click “Import”.
- If you have a private key for your existing wallet, select the “Import using private key” option.
- Enter your private key in the designated input field and click “Import”.
- Metamask will import your existing wallet, and you will see your accounts and balances in the extension.
That’s it! You have successfully imported your existing wallet to Metamask. Now you can use Metamask to manage and utilize your wallet for various purposes like interacting with decentralized applications, sending and receiving cryptocurrencies, and more.
Understanding Metamask interface
Metamask is a browser extension that allows users to interact with the Ethereum blockchain. It provides a user-friendly interface for managing Ethereum accounts, as well as for executing smart contracts and sending/receiving Ether.
Metamask installation
- Install Metamask by navigating to the official website or searching for it in your browser’s extension store.
- Click “Install” and follow the instructions to complete the installation process.
- Once installed, you’ll see the Metamask icon added to your browser’s toolbar.
Metamask setup
To start using Metamask, follow these instructions:
- Click on the Metamask icon in your browser’s toolbar to open the extension.
- If you already have a wallet, click “Import Wallet” and enter your seed phrase or private key.
- If you don’t have a wallet, click “Create Wallet” and follow the instructions to create a new one.
- Set a password for your wallet to secure it from unauthorized access.
- Once your wallet is set up, you can start using Metamask to manage your Ethereum accounts.
Metamask usage
Here are some key features and functions of Metamask:
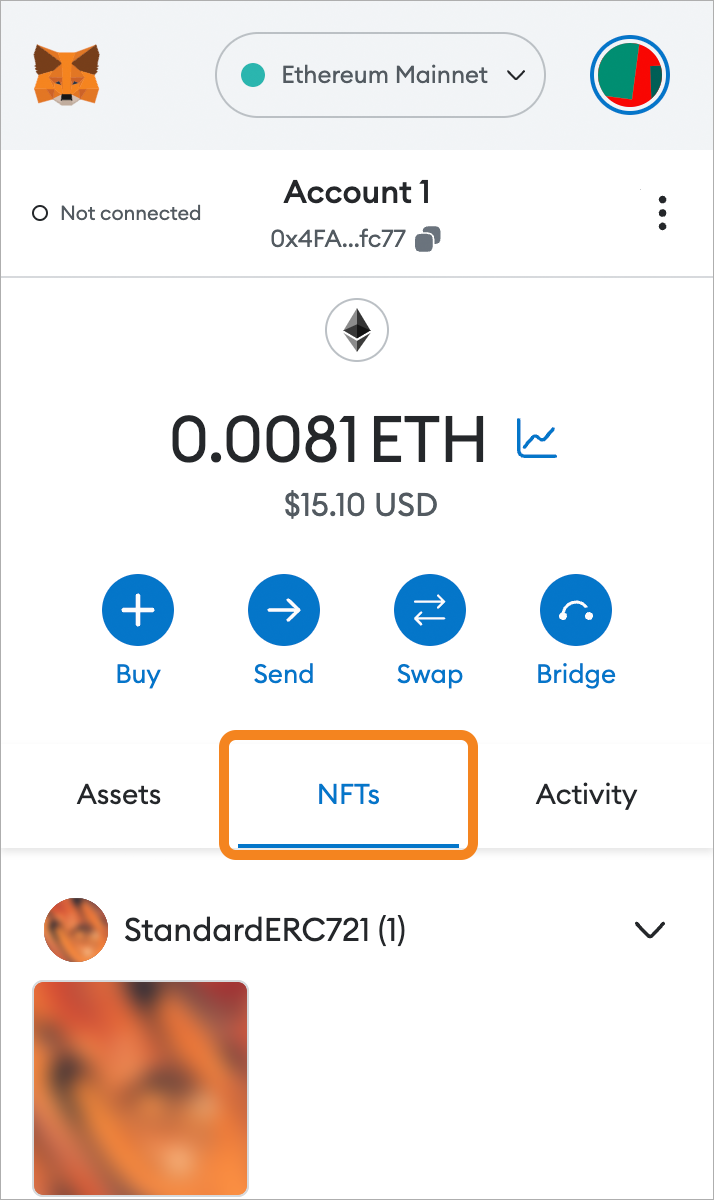
- Account information: Metamask displays the currently active account, account balance, and network information.
- Sending/receiving Ether: You can easily send Ether to other Ethereum addresses by clicking on the “Send” button and entering the recipient’s address.
- Executing smart contracts: Metamask allows you to interact with smart contracts by providing the contract address and selecting the specific function you want to execute.
- Switching networks: You can switch between different Ethereum networks (e.g., Mainnet, Testnet) by clicking on the network dropdown.
- Managing multiple accounts: Metamask allows you to create and manage multiple Ethereum accounts within the same wallet.
Metamask security
It’s important to note that while Metamask provides a convenient interface for interacting with Ethereum, it’s crucial to practice proper security measures:
- Backup your seed phrase: Metamask generates a unique seed phrase that acts as a backup for your wallet. Make sure to write it down and store it in a safe place.
- Keep your password secure: Choose a strong and unique password for your wallet and avoid sharing it with anyone.
- Be cautious of phishing attempts: Always double-check the website you are interacting with and avoid clicking on suspicious links.
By understanding the Metamask interface and following the instructions on setup and usage, you can effectively utilize Metamask for your Ethereum transactions and smart contract interactions.
Adding tokens to Metamask
Metamask is a popular browser extension that allows users to interact with the Ethereum blockchain. In addition to storing and managing Ethereum and other cryptocurrencies, Metamask also supports the integration of various tokens.
Instructions:
- Open the Metamask extension in your browser.
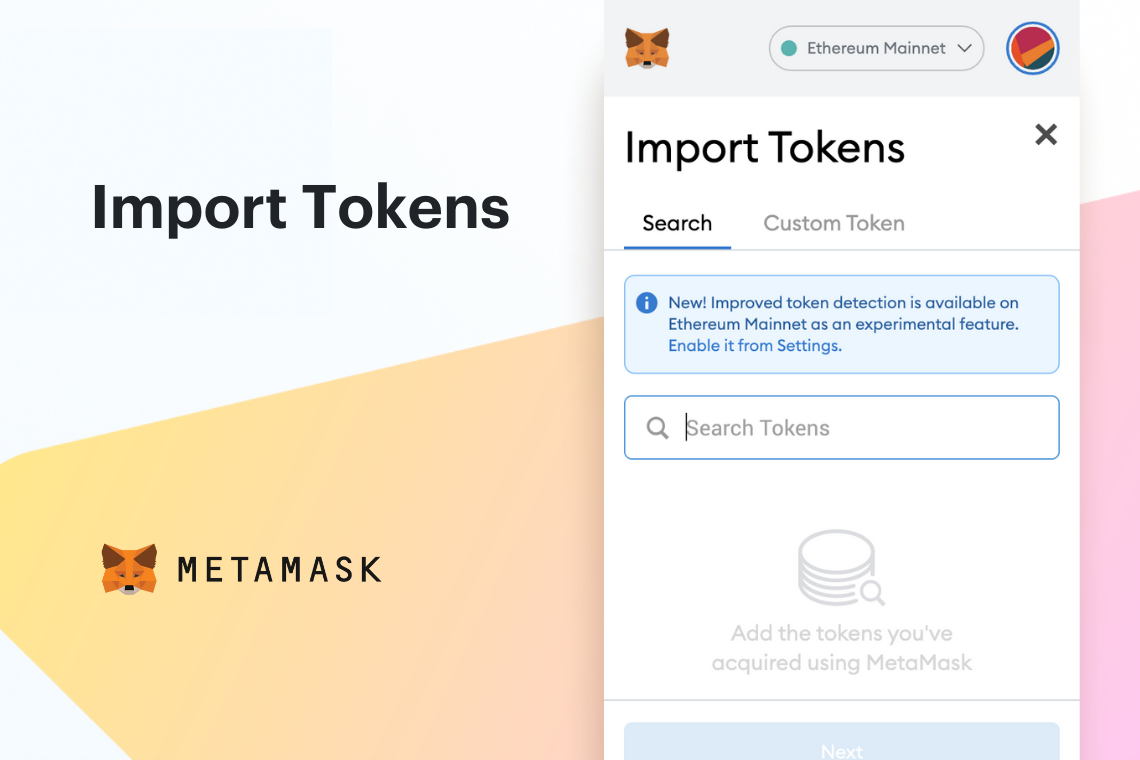
- Click on the account icon in the top right corner and select “Add Token”.
- In the “Token Contract Address” field, enter the contract address of the token you want to add.
- Metamask will automatically populate the “Token Symbol” and “Decimals of Precision” fields based on the token contract address.
- Click on the “Next” button.
- You will see a summary of the token details. Review the information to ensure it matches the token you want to add.
- Click on the “Add Tokens” button to finalize the process.
- The token will now appear in your Metamask wallet, and you will be able to view your balance and utilize the token as needed.
Note: Make sure to verify the contract address and token details before adding a token to Metamask. Scammers can create tokens with similar names and symbols to deceive users. Always double-check the information before proceeding.
Adding tokens to Metamask expands its usage capabilities and allows you to conveniently manage a variety of cryptocurrencies and tokens within a single wallet. Follow the above instructions to easily add tokens to your Metamask wallet.
Sending and receiving cryptocurrencies with Metamask
In this guide, we will learn how to send and receive cryptocurrencies using Metamask. Metamask is a popular wallet used to interact with Ethereum and other blockchain networks. By following these instructions, you will be able to send and receive cryptocurrencies with ease.
Step 1: Install and set up Metamask
- First, download and install the Metamask extension for your web browser.
- Once installed, open Metamask and create a new wallet or import an existing one.
- Follow the on-screen instructions to set up your wallet and secure it with a strong password.
- Make sure to back up your wallet’s seed phrase and store it in a safe place.
Step 2: Add a cryptocurrency to your Metamask wallet
- Click on the Metamask extension icon in your browser to open it.
- On the main screen, click on the account dropdown and select “Add Token.”
- Choose the cryptocurrency you want to add from the list or paste its contract address manually.
- Click “Next” and then “Add Tokens” to add the cryptocurrency to your wallet.
Step 3: Sending cryptocurrencies
- To send a cryptocurrency, open Metamask and click on the “Send” button.
- Enter the recipient’s wallet address in the “To” field.
- Choose the cryptocurrency you want to send from the dropdown menu.
- Enter the amount you want to send and any optional notes.
- Review the transaction details and click “Next.”
- Confirm the transaction and wait for it to be processed on the blockchain.
Step 4: Receiving cryptocurrencies
- To receive a cryptocurrency, open Metamask and click on the “Receive” button.
- Your wallet address will be displayed. You can copy it or share it with others to receive funds.
- You can also generate a new wallet address by clicking on the “…” button and selecting “Create Account.”
With these instructions, you now know how to utilize Metamask to send and receive cryptocurrencies. Remember to always double-check the wallet addresses before sending or receiving any funds to ensure their security.
Managing security settings in Metamask
Metamask is a popular cryptocurrency wallet browser extension that allows users to interact with decentralized applications (dApps) on the Ethereum blockchain. To ensure the safety of your digital assets, it is important to properly manage the security settings in Metamask. This guide provides step-by-step instructions on how to do so.
1. Enable password protection
To enhance the security of your Metamask wallet, it is essential to set a strong password. Follow these instructions to enable password protection:
- Open the Metamask extension in your browser.
- Click on the profile icon in the top right corner and select “Settings” from the dropdown menu.
- Scroll down to the “Security & Privacy” section and click on “Lock” under “Account details”.
- Enter and confirm your desired password.
- Click on “Enable” to activate password protection.
2. Backup your wallet
Creating a backup of your Metamask wallet is crucial in case your device gets lost or compromised. Follow these steps to back up your wallet:
- Open the Metamask extension in your browser.
- Click on the profile icon in the top right corner and select “Settings” from the dropdown menu.
- Scroll down to the “Security & Privacy” section and click on “Reveal seed phrase”.
- Enter your account password.
- Write down the 12-word seed phrase and keep it in a safe place. Do not share it with anyone.
3. Enable two-factor authentication (2FA)

Adding an extra layer of security to your Metamask wallet with two-factor authentication (2FA) is highly recommended. Follow these instructions to enable 2FA:
- Open the Metamask extension in your browser.
- Click on the profile icon in the top right corner and select “Settings” from the dropdown menu.
- Scroll down to the “Security & Privacy” section and click on “Advanced”.
- Enable 2FA by following the instructions provided. This may involve using a third-party app such as Google Authenticator or Authy.
4. Keep your software up to date
Metamask releases regular updates to fix bugs and enhance security. It is essential to keep your Metamask software up to date to ensure you have the latest security patches. Follow these steps to update Metamask:
- Open the Metamask extension in your browser.
- Click on the profile icon in the top right corner and select “Settings” from the dropdown menu.
- Scroll down to the “Advanced” section and click on “Security & Privacy” and then “Updates”.
- Enable the “Automatically Update” option or click on “Check for updates” to manually update the extension.
By following this guide, you can utilize Metamask’s security settings to secure your digital assets and protect yourself from potential security threats.
Advanced features of Metamask

Metamask is not just a simple wallet, it offers a range of advanced features that can enhance your usage and make your transactions more efficient. In this guide, we will provide step-by-step instructions on how to utilize these advanced features of Metamask.
1. Custom Gas Settings
Metamask allows you to adjust the gas limit and gas price for your transactions. To do this, follow these instructions:
- Open your Metamask wallet and click on the “Settings” tab.
- Scroll down and click on “Advanced.”
- Enable the option “Customize transaction fees.”
- You can now set your desired gas limit and gas price for each transaction.
- Click “Save” to apply the changes.
2. Adding Custom Tokens
If you want to use tokens that are not listed by default in Metamask, you can add them manually by following these instructions:
- Open your Metamask wallet and click on the “Assets” tab.
- Scroll down and click on “Add Token.”
- Choose whether you want to add a token from the Ethereum Mainnet, a Testnet, or a custom token.
- Enter the contract address, token symbol, and decimal places.
- Click “Next” and then “Add tokens” to complete the process.
3. Connecting Hardware Wallets
Metamask supports various hardware wallets, such as Ledger and Trezor. To connect your hardware wallet to Metamask, follow these instructions:
- Plug in your hardware wallet and make sure it is unlocked.
- Open your Metamask wallet and click on the account icon at the top right corner.
- Click on “Connect Hardware Wallet.”
- Choose your hardware wallet from the list.
- Follow the on-screen instructions to complete the connection process.
4. Multisig Wallet Integration
Metamask also allows you to utilize Multisig wallets for enhanced security and control over your funds. To integrate a Multisig wallet, follow these instructions:
- Create a Multisig wallet using a platform like Gnosis Safe.
- Open your Metamask wallet and click on the “Settings” tab.
- Scroll down and click on “Advanced.”
- Enable the option “Use a custom signing provider.”
- Enter the URL of your Multisig wallet’s signing provider.
- Click “Save” to apply the changes.
By utilizing these advanced features of Metamask, you can enhance your experience and have more control over your transactions. Make sure to follow the instructions carefully and explore the various options available to you in Metamask.
Frequently asked questions:
What is Metamask?
Metamask is a browser extension that allows users to interact with built-in Ethereum wallets and decentralized applications directly from their browser, without the need to run a full Ethereum node.
How do I install Metamask?
To install Metamask, go to the browser extension store (such as Chrome Web Store), search for Metamask, and click “Add to Chrome” or the equivalent button for your browser. Follow the prompts to complete the installation process.
Can I use Metamask on my mobile device?
Yes, Metamask is available as a mobile app for both iOS and Android devices. You can download it from the respective app stores and follow the setup process to start using Metamask on your mobile device.
How do I backup my Metamask wallet?
To backup your Metamask wallet, click on the account icon in the top-right corner of the extension, select “Settings”, then “Security & Privacy”, and finally click on “Reveal Seed Phrase”. Write down the seed phrase and keep it in a safe place, as this is the only way to restore your wallet in case of loss or device change.
Videos:
Metamask: Step-by-Step Guide To DeFi’s BEST Wallet!!
I found this guide extremely helpful! As a beginner in the world of cryptocurrencies, I was a bit overwhelmed with setting up Metamask. But this step-by-step guide made it so easy to understand. Now, I can securely manage my Ethereum wallets and explore various dApps without any hassle. Thank you!
How long does it take to set up a Metamask account?
Setting up a Metamask account is a quick and straightforward process. It typically takes just a few minutes to complete. First, you’ll need to download the Metamask browser extension for Chrome, Firefox, or Brave. Once installed, you can create a new wallet by following the step-by-step instructions provided by the extension. This includes setting up a strong password and securely backing up your seed phrase. Overall, the entire setup process is designed to be user-friendly and accessible, making it easy for both beginners and experienced users. Happy Metamask account setup!
Can you explain how to set up custom networks on Metamask?
Sure, I’d be happy to explain how to set up custom networks on Metamask!
To set up a custom network on Metamask, follow these steps:
1. Open your Metamask extension in your browser.
2. Click on the network dropdown menu and select “Custom RPC” at the bottom.
3. Fill in the network details, including the network name, RPC URL, chainID, and symbol (if applicable).
4. Click on “Save” to save the custom network configuration.
That’s it! Now you can easily connect to your custom network on Metamask and start exploring and interacting with dApps and other Ethereum applications specific to that network.
Hope this helps! Let me know if you have any other questions.
This guide is amazing! I followed the steps and successfully set up my Metamask account. It was so easy to understand and the instructions were clear. Now I can securely manage my Ethereum wallets and explore decentralized applications. Thank you!
Can I use Metamask on my mobile phone as well?
Yes, Emma_Smith, you can use Metamask on your mobile phone too! Metamask has a mobile app available for both iOS and Android devices. Simply download the app from the App Store or Google Play Store, and you’ll be able to access and use your Metamask wallets on your phone. It’s a great way to stay connected and manage your Ethereum transactions on the go. Enjoy!
Is Metamask compatible with Safari as well? I primarily use Safari as my browser and want to make sure I can use Metamask with it.
Yes, Metamask is compatible with Safari. You can easily install the Metamask browser extension for Safari and use it to manage your Ethereum wallets and interact with dApps. Happy exploring!
I recently started using Metamask and it has made my Ethereum transactions so much easier! The step-by-step guide provided here is very helpful for beginners. I highly recommend giving it a try!
I have been using Metamask for a while now and it has made my Ethereum transactions so much easier. The step-by-step guide provided here is really helpful for beginners to get started. Highly recommend!
I recently started using Metamask and this guide was incredibly helpful! The step-by-step instructions made it so easy to set up and utilize Metamask for my Ethereum transactions. I highly recommend this guide to anyone who is new to Metamask.
I found this step-by-step guide very helpful. It was easy to follow and understand. I appreciate the detailed instructions on setting up and utilizing Metamask. Now I feel confident in navigating the world of cryptocurrencies and decentralized applications. Thank you!
Can you explain how to backup the seed phrase? I want to make sure my wallet is secure.
Hi Alice123! I’d be happy to explain how to backup the seed phrase. To ensure the security of your wallet, follow these steps:
1. Open your Metamask extension and click on your account avatar in the top right corner.
2. Select “Settings” from the dropdown menu.
3. Scroll down to the “Security & Privacy” section and click on “Reveal Seed Phrase.”
4. Confirm your Metamask password to view the seed phrase.
5. Write down the 12 or 24-word seed phrase in the exact order displayed. Make sure to write it on a piece of paper and keep it in a safe place, away from prying eyes and potential damage.
6. Once you’ve written down the seed phrase, click on each word to confirm you’ve properly recorded it. This will help to avoid any errors during the recovery process.
Remember, never share your seed phrase with anyone and keep it offline to prevent unauthorized access to your funds. Backup your seed phrase is crucial as it is the key to recovering your wallet in case your device is lost, stolen, or damaged. Hope this helps in ensuring the security of your wallet! If you have any more questions, feel free to ask.
Thanks for the informative guide! I’ve been wanting to learn how to use Metamask and this step-by-step article is exactly what I needed. Can’t wait to start managing my Ethereum wallets and exploring dApps.
Thanks for the detailed guide! I’ve been wanting to try out Metamask and this step-by-step tutorial makes it seem so easy. Can’t wait to start exploring the world of dApps on the Ethereum blockchain!
I have been using Metamask for a while now and it has made my Ethereum transactions so much easier! The step-by-step guide provided here is really helpful for beginners. Thanks for sharing!
Great guide! I’m wondering if Metamask supports any other cryptocurrencies apart from Ether?
Hi BlockchainEnthusiast! Yes, Metamask supports various ERC-20 tokens along with Ether. You can easily add any custom token to your Metamask wallet by pasting the contract address. Make sure to double-check the accuracy of the contract address before adding it. Enjoy exploring the world of decentralized applications with Metamask!
I just started using Metamask and this step-by-step guide was incredibly helpful. I was able to easily set up my Metamask account and start using it to manage my Ethereum wallets. The instructions were clear and easy to follow. Thank you for providing such a comprehensive guide!
This guide was really helpful! I followed the step-by-step instructions and now I feel confident using Metamask for my Ethereum transactions. Thank you!
Thanks for the detailed guide! I’ve been wanting to try out Metamask but wasn’t sure where to start. With this step-by-step instructions, I feel confident in setting up my account and exploring the world of cryptocurrencies. Keep up the great work!
As an avid cryptocurrency enthusiast, I have been using Metamask for quite some time now. It’s a fantastic tool for managing Ethereum wallets and navigating the world of decentralized applications. This step-by-step guide is a great resource for beginners looking to get started with Metamask. I highly recommend giving it a read!
Thanks for the detailed guide! I’ve been wanting to learn how to use Metamask and this step-by-step explanation makes it so much easier. Can’t wait to start exploring dApps on the Ethereum blockchain!
Thanks for the detailed guide! I’ve been wanting to try out Metamask but wasn’t sure where to start. This step-by-step instruction is exactly what I needed. Looking forward to utilizing this powerful tool to manage my Ethereum wallets and explore the world of dApps and DeFi platforms.
Great article! But I have a question, can Metamask be used with other cryptocurrencies like Bitcoin or only Ethereum?
Hi cryptoenthusiast88! Thank you for your question. Metamask is primarily designed for use with the Ethereum blockchain and is optimized for Ethereum-based cryptocurrencies like Ether (ETH) and ERC-20 tokens. It may not support other cryptocurrencies like Bitcoin directly. However, there are third-party solutions that can enable limited Bitcoin functionality within Metamask using tokenized versions of Bitcoin on the Ethereum blockchain. These are often referred to as wrapped Bitcoin (WBTC) or synthetic Bitcoin (sBTC). It’s always best to check with the official Metamask documentation for the most up-to-date information on supported cryptocurrencies. Hope this helps!
I recently started using Metamask and this guide was extremely helpful in setting it up. The step-by-step instructions made the process seamless and I was able to start managing my Ethereum wallets and interacting with dApps in no time. Thank you for providing such a comprehensive guide!
Wow, this guide is incredibly useful! I’ve been wanting to learn how to use Metamask for a while now, and this step-by-step tutorial is just what I needed. The instructions are clear and easy to follow. Thanks for sharing!
Great article! I’ve been using Metamask for a while now and it’s been a game-changer for my Ethereum transactions. The step-by-step guide provided here is really helpful for beginners to get started with Metamask. Keep up the good work!
Can Metamask be used on mobile devices? I mainly use my phone for browsing and would love to have access to dApps on the go.
Hi Jenny99! Yes, you can definitely use Metamask on mobile devices. Metamask is available as a mobile app for both iOS and Android. You can easily download it from the App Store or Google Play. Once installed, you’ll have access to all the features of Metamask, including the ability to interact with dApps on the go. Happy browsing!
Wow, this guide is amazing! I’ve been using Metamask for a while now and it has made my Ethereum transactions so seamless. It’s great to see a step-by-step guide that covers all the important aspects of using Metamask. Thanks for sharing!
Thank you for this helpful guide! I’ve been wanting to learn how to use Metamask and this step-by-step explanation makes it so much easier. I’ll definitely be downloading and trying it out!
Is it possible to use Metamask on mobile devices? I primarily use my phone for accessing the internet.
Hi Alex123, yes, it is possible to use Metamask on mobile devices! Metamask has a mobile app available for both iOS and Android. You can easily download and install it from the respective app stores. Once installed, you’ll be able to access your Ethereum wallets, send and receive Ether, and interact with dApps on the go. Happy exploring!
I found this guide extremely helpful in setting up my Metamask account. The step-by-step instructions were clear and easy to follow. Thank you for providing such a comprehensive guide!
Great guide! I’ve been using Metamask for a while now and it’s made my Ethereum transactions a breeze. Highly recommend it to anyone starting out with cryptocurrency.
I recently started using Metamask and this guide was incredibly helpful! The step-by-step instructions made it easy for me to set up my account and start using it for Ethereum transactions. I really appreciate the emphasis on wallet security and backing up the seed phrase. Metamask has definitely become an essential tool for me in the world of cryptocurrencies.
Can Metamask be used with other cryptocurrencies or only Ethereum?
Yes, Metamask can be used with other cryptocurrencies as well. While it is primarily designed for Ethereum, you can also use Metamask to interact with other Ethereum-based tokens and assets. Additionally, Metamask supports various blockchains and can be configured to work with networks like Binance Smart Chain and Avalanche. So you have the flexibility to manage multiple cryptocurrencies within the same wallet. Hope this helps!
Wow, this guide is really helpful! I’ve been wanting to learn how to use Metamask, and this step-by-step tutorial makes it so much easier. Thank you for sharing!
Can you explain how to import an existing wallet in Metamask? I already have an Ethereum wallet and I want to use it with Metamask.
Sure, cryptoGuru! Importing an existing wallet in Metamask is easy. Here are the steps you need to follow:
1. Open Metamask and click on the account icon in the top-right corner.
2. From the account dropdown menu, select “Import Account”.
3. In the import screen, choose the type of wallet you want to import. Metamask supports various types, including hardware wallets, mnemonic phrases, and private keys.
4. Enter the required information based on the type of wallet you chose. For example, if you’re importing using a mnemonic phrase, enter the phrase in the designated box.
5. Click “Import” to complete the process.
Once you’ve imported your existing wallet, it will be added as an account in Metamask, and you’ll be able to use it for Ethereum transactions and interact with dApps. Happy using Metamask with your existing wallet!
Thanks for the informative guide! I’ve been wanting to learn how to use Metamask and this step-by-step explanation made it much easier for me. I appreciate the detailed instructions on setting up and utilizing Metamask. Can’t wait to start exploring the world of cryptocurrencies and dApps with this powerful tool!
Is Metamask available for mobile devices as well?
Yes, Metamask is available for mobile devices too. You can download and install the Metamask app on your Android or iOS device. With the mobile app, you’ll be able to access your Ethereum wallets and interact with dApps on the go. It’s a convenient way to manage your cryptocurrencies. Give it a try!
Can I use Metamask with other cryptocurrencies or only Ethereum?
Yes, you can use Metamask with other cryptocurrencies as well. While it is primarily designed for Ethereum, Metamask also supports other popular cryptocurrencies such as Bitcoin (through integration with Wrapped BTC), Binance Coin, and many more. This makes it a versatile wallet for managing multiple digital assets.
Can Metamask be used with other cryptocurrencies or just Ethereum?
Yes, Metamask can be used with other cryptocurrencies besides Ethereum. It supports various networks such as Binance Smart Chain, Polygon, and many more. You can easily add these networks to Metamask and manage your different crypto assets all in one place. Happy exploring!
I have been using Metamask for a while now and it’s been a game-changer! The step-by-step guide provided here is extremely helpful for anyone new to Metamask. I highly recommend giving it a try and exploring the world of cryptocurrencies and decentralized applications.
Great article! I’ve been using Metamask for a while now and it has made my Ethereum transactions so seamless. The step-by-step guide is really helpful for beginners. Keep up the good work!
Wow, this guide is incredibly helpful! I’ve been wanting to start using Metamask, but didn’t know where to begin. The step-by-step instructions make it so easy to understand. Thank you!
Can Metamask be used with other cryptocurrencies or only Ethereum?
Yes, Metamask can be used with other cryptocurrencies in addition to Ethereum. While Metamask is primarily designed for Ethereum, it also supports other blockchains such as Binance Smart Chain and Polygon. You can easily add these networks to your Metamask wallet and manage your various cryptocurrencies in one place.
Is there an iOS version of Metamask available? I’m interested in using it on my iPhone.
Yes, Metamask is available for iOS devices. You can download the Metamask app from the App Store and easily set it up on your iPhone. Once installed, you can enjoy all the features and functionality of Metamask on your mobile device. Happy exploring!
Thanks for sharing this step-by-step guide! I’ve been meaning to learn how to use Metamask and this article provides all the information I need. Looking forward to setting up my account and exploring the world of decentralized applications.
I’ve been using Metamask for a while now and I must say, it’s incredibly user-friendly. The step-by-step guide made it so easy for me to set up and start using the wallet. Highly recommend it!
Thanks for this step-by-step guide! I’ve been wanting to try out Metamask and this tutorial makes it seem so easy. Can’t wait to start managing my Ethereum wallets and exploring dApps!
Thanks for sharing this step-by-step guide on how to use Metamask! It’s really helpful for beginners like me who are just getting started with Ethereum. I’m excited to explore the world of cryptocurrencies and decentralized applications with Metamask. Keep up the great work!
Can you explain how Metamask handles gas fees for transactions? I’m curious to know more about it.
Hey crypto_guru, Metamask handles gas fees for transactions by allowing users to set the gas price and gas limit when sending a transaction on the Ethereum network. Gas price is the amount you pay per unit of gas, which determines how fast your transaction will be processed by miners. The gas limit is the maximum amount of gas you are willing to spend on a transaction. By adjusting these settings in Metamask, you can control the cost and speed of your transactions. Hope this helps!
Can you explain the process of importing an existing wallet into Metamask? I’m interested in using Metamask, but I already have an Ethereum wallet with funds in it.
Sure thing, crypto_expert87! Importing an existing wallet into Metamask is a straightforward process. First, open Metamask and click on the profile icon in the top right corner. Then, select ‘Import Account’ and enter your wallet’s private key or seed phrase. Metamask will then import your wallet with its existing funds, allowing you to seamlessly access your Ethereum holdings and interact with dApps. Happy exploring with Metamask!
I found the step-by-step guide on setting up Metamask extremely helpful. As a newcomer to the world of cryptocurrencies, this guide made it easy for me to understand the process of installing and using Metamask. I appreciate the detailed instructions provided, and now I feel more confident navigating decentralized applications on the Ethereum blockchain. Thank you!
Could you clarify more about the process of setting up a new wallet on Metamask? I’m interested in learning this step in detail.
Sure, setting up a new wallet on Metamask is a simple process. To begin, download the Metamask extension for your preferred browser (Chrome, Firefox, or Brave). Once installed, click on the Metamask icon in your browser toolbar, and follow the on-screen instructions to create a new wallet. You will be asked to set up a password and backup your seed phrase. Make sure to store your seed phrase in a safe place as it is crucial for wallet recovery. After completing these steps, your new wallet will be ready for use on Metamask. I hope this helps!
How do I go about setting up my Metamask account? Is it a straightforward process?
Setting up your Metamask account is a relatively straightforward process. To begin, you’ll need to download the Metamask browser extension for Chrome, Firefox, or Brave. Once installed, follow the on-screen prompts to create a new wallet. Remember to securely store your seed phrase and set a strong password to keep your account safe. If you encounter any difficulties during the setup, Metamask’s support team is responsive and helpful in resolving any issues you may face. Happy setting up!
Could you provide more details on how to set up multiple accounts on Metamask? I’m interested in managing different wallets within the same extension.
Sure, to set up multiple accounts on Metamask, you can click on your account icon in the top right corner, then select “Create Account.” This will allow you to manage different wallets within the same extension easily. Each account will have its unique Ethereum address and account name for convenient organization.
Could you provide more information on how to set up custom networks in Metamask?
Sure, setting up custom networks in Metamask is a great way to access different blockchains and network environments within the Metamask wallet. To set up a custom network, you’ll need to open Metamask, click on the network selection button, and choose “Custom RPC.” From there, you can enter the details of the network you want to connect to, including the network name, RPC URL, chain ID, symbol, and block explorer URL. Once you’ve entered all the necessary information, click “Save” to add the custom network to your Metamask configuration. This feature allows you to interact with various blockchain networks beyond just Ethereum, providing you with more flexibility in your decentralized applications usage.
Setting up my Metamask account was a breeze with this guide! I appreciate the step-by-step instructions that made it easy for even beginners like me to understand the process. Metamask has truly simplified my interactions with dApps on the Ethereum blockchain.
I found this step-by-step guide very helpful for setting up my Metamask account. It’s great for beginners like me who are new to Ethereum and decentralized applications. The instructions were clear and easy to follow. I highly recommend it!
Setting up my Metamask account was a breeze with this step-by-step guide! I appreciated the clear instructions on downloading and installing the wallet. Can’t wait to explore decentralized applications with it.
Setting up my Metamask account was a breeze with the step-by-step guide provided. I feel confident now managing my Ethereum wallets and exploring various dApps. The importance of securing my seed phrase was highlighted well. This guide is a must for anyone entering the world of cryptocurrencies and DeFi platforms.
How secure is it to store my Ethereum in Metamask? Can I trust it with my funds?
Hey MeganSmith_22, storing your Ethereum in Metamask is generally secure as long as you follow best security practices. Metamask uses advanced encryption techniques to protect your funds, but it’s crucial to keep your seed phrase safe and not share it with anyone. Trusting it with your funds depends on your own security measures; just like with any cryptocurrency wallet, being vigilant and cautious is key. Hope this helps!
Setting up a Metamask account is crucial for anyone diving into the world of cryptocurrencies. I highly recommend following this step-by-step guide to ensure seamless transactions and secure interactions with dApps on the Ethereum blockchain. Metamask’s user-friendly interface makes it easy for both beginners and seasoned users to manage their Ethereum wallets and explore the realm of decentralized finance.
Setting up your Metamask account is crucial for seamless interaction with decentralized applications on the Ethereum blockchain. I found the step-by-step guide incredibly helpful in navigating the setup process and understanding how to utilize Metamask effectively. It’s a powerful tool that simplifies Ethereum transactions and enhances the overall user experience in the world of cryptocurrencies.
Setting up my Metamask account was a breeze thanks to this guide! I appreciate the clear instructions provided here, especially for a beginner like myself. Can’t wait to start exploring decentralized applications with Metamask!
Setting up my Metamask account was a breeze with this guide! I appreciate the clear step-by-step instructions provided. It’s essential for newcomers to the world of cryptocurrencies and decentralized applications. Thanks for simplifying the process!
Setting up my Metamask account was a breeze thanks to this guide! I appreciate the step-by-step instructions provided, it made the process very user-friendly and straightforward. I feel more confident now in managing my Ethereum wallets and engaging with various dApps on the blockchain. Highly recommend for anyone looking to dive into the world of cryptocurrencies!
Setting up a Metamask account is essential for anyone interested in navigating the world of cryptocurrencies. Metamask provides a secure and user-friendly platform for interacting with decentralized applications on the Ethereum blockchain. Following this step-by-step guide will empower users to seamlessly manage their Ethereum wallets, send and receive Ether, and explore various DeFi platforms.
How secure is Metamask for managing multiple accounts and interacting with various dApps on the Ethereum blockchain?
Metamask provides a high level of security when managing multiple accounts and interacting with various dApps on the Ethereum blockchain. By using encryption and secure authentication methods, Metamask ensures that your accounts and transactions are safeguarded against potential threats. It’s essential to follow best practices such as enabling two-factor authentication and regularly updating the software to maintain a secure environment.
Setting up a Metamask account was quite straightforward with the step-by-step guide provided here. I appreciate the detailed instructions on installing the browser extension and managing Ethereum wallets. Metamask seems like a powerful tool for anyone looking to engage with decentralized applications on the blockchain.
Setting up a Metamask account was a breeze with the step-by-step guide provided here. I appreciate the detailed instructions on how to download and install the wallet extension. Looking forward to exploring decentralized applications with Metamask!
Setting up my Metamask account was a breeze with this guide! I appreciated the clear instructions provided for downloading and installing the wallet extension. Can’t wait to dive into the world of decentralized applications and cryptocurrencies!
How do I switch between multiple accounts on Metamask? Can you provide detailed instructions on managing them efficiently?
To switch between multiple accounts on Metamask, you can follow these steps:
1. Open your Metamask extension on your browser.
2. Click on your account avatar located at the top right corner.
3. Select the account you want to switch to from the dropdown menu.
Managing multiple accounts efficiently can help you better organize your transactions and activities within Metamask. Hope this helps!
Could you clarify how to securely back up the seed phrase in Metamask? Is it a straightforward process?
Backing up your seed phrase in Metamask is crucial for ensuring the security of your funds. To securely back up your seed phrase, simply navigate to the Metamask settings, select “Security & Privacy,” and then click on “Reveal Seed Phrase.” Write down the seed phrase on a piece of paper and store it in a safe place, preferably offline. Remember to never share your seed phrase with anyone and refrain from storing it digitally to prevent potential hacks or breaches.
Is Metamask suitable for managing multiple cryptocurrencies besides Ether, or is it primarily focused on Ethereum transactions?
Metamask is primarily focused on Ethereum transactions but also supports managing various ERC-20 tokens, which are tokens built on the Ethereum blockchain. This means that while its main use is for interacting with Ethereum-based dApps and handling Ether, you can indeed use Metamask to manage multiple cryptocurrencies that are based on the Ethereum network. Its versatility makes it a convenient choice for users looking to engage with different tokens and decentralized applications within the Ethereum ecosystem.
Setting up my Metamask account was a breeze thanks to the clear instructions provided in this guide. I feel more confident now in navigating the world of cryptocurrencies and dApps. Looking forward to exploring all the possibilities with Metamask!
Setting up a Metamask account is crucial for anyone looking to engage with Ethereum dApps. This step-by-step guide makes the process seamless and user-friendly. Can’t wait to get started!
As an experienced cryptocurrency enthusiast, I can attest to the importance of understanding how to use Metamask properly. This step-by-step guide is a fantastic resource for both beginners and seasoned users looking to navigate the world of Ethereum and decentralized applications. Metamask truly is an invaluable tool that enhances the blockchain journey for all users!
How secure is it to store cryptocurrencies on Metamask? Can it be prone to hacking?
Storing cryptocurrencies on Metamask is generally secure if you follow best practices. Metamask uses state-of-the-art security measures to protect your assets, such as encryption and secure key management. However, like any online platform, there is always a risk of potential hacking attempts, so it’s crucial to safeguard your seed phrase and enable additional security features for added protection.
Setting up a Metamask account is crucial for anyone looking to dive into the world of decentralized applications on the Ethereum blockchain. It provides a user-friendly interface for managing Ethereum wallets, facilitating secure transactions, and engaging with a variety of dApps and DeFi platforms. Following the step-by-step guide will equip you with the necessary skills to navigate the complexities of Metamask effectively. Remember to safeguard your seed phrase for enhanced security!
If you’re new to Metamask, this guide will walk you through the process step by step, making it easy to set up your account and start interacting with decentralized applications on the Ethereum blockchain. Metamask is a powerful tool that opens up a world of possibilities in the realm of cryptocurrencies. Happy learning!
Could you provide more information on how to securely backup the seed phrase in Metamask? I want to ensure the safety of my wallet.
Sure, backing up your seed phrase in Metamask is crucial for wallet security. To securely backup your seed phrase, follow these steps: 1. Open your Metamask extension. 2. Click on your account icon. 3. Select “Settings.” 4. Scroll down to find “Security & Privacy.” 5. Click on “Reveal Seed Phrase.” Make sure you write down the seed phrase on paper and store it in a secure location offline. Do not share your seed phrase with anyone and never store it digitally. By following these steps, you’ll ensure the safety of your Metamask wallet. Stay secure!
How secure is it to use Metamask for transactions? Does it offer any additional security features?
Metamask provides a secure platform for transactions on the Ethereum blockchain. It offers additional security features such as password protection, encryption of private keys, and the option to set up multi-factor authentication. Rest assured, your transactions with Metamask are safeguarded with layers of security measures.
Setting up my Metamask account was a breeze thanks to this guide! I appreciate the step-by-step instructions provided here. Metamask is truly a game-changer for managing my Ethereum transactions and interacting with dApps. Highly recommend for both beginners and experienced users.
Could you please provide more details on how to set up custom networks in Metamask? This guide seems comprehensive, but I’m particularly interested in exploring that aspect. Thank you!
Sure, Emily19! To set up custom networks in Metamask, go to the settings by clicking on the profile icon. From there, select “Networks,” then click on “Add Network.” You’ll need to fill in the network name, RPC URL, Chain ID, currency symbol, and block explorer URL if applicable. Once you’ve added it, you can switch to your new network anytime. Let me know if you need more help with this!
As a beginner in the world of cryptocurrencies, I found this step-by-step guide on using Metamask extremely helpful and easy to follow. The instructions provided here allowed me to set up my account with ease and start exploring the decentralized applications on the Ethereum blockchain. I highly recommend this guide to anyone looking to get started with Metamask!
I’ve been using Metamask for a while now, and it has simplified my Ethereum transactions immensely. This step-by-step guide is a great resource for beginners looking to get started with this powerful tool. Thanks for breaking it down so clearly!
Setting up a Metamask account is essential for anyone looking to explore the world of cryptocurrencies. Metamask provides a user-friendly interface for managing Ethereum wallets and interacting with dApps. I appreciate the step-by-step guide provided here, it’s a great resource for beginners!
How do I set up a new wallet using Metamask? The article mentions it briefly, but I’m looking for more detailed instructions. Can you provide step-by-step guidance on creating a new wallet with Metamask?
Hi EmilyJones89! To set up a new wallet using Metamask, first, make sure you’ve downloaded and installed the extension. Once that’s done, click the Metamask icon in your browser. You’ll see an option to create a new wallet. Just follow the prompts—choose a strong password, and it will give you a seed phrase. Make sure to back that up safely! After that, you can start managing your Ethereum assets. If you need more help, feel free to ask!
I recently started using Metamask, and I have to say, it makes managing my Ethereum transactions so much easier! The step-by-step guide provided here is incredibly helpful, especially for beginners like me. I appreciate how straightforward it is to set up a new wallet and send Ether securely. Highly recommend it if you’re getting into cryptocurrencies!
I recently set up my Metamask wallet using this guide, and I found it incredibly helpful! The step-by-step instructions made the process straightforward, even for someone new to cryptocurrencies like me. I appreciate the emphasis on security and the tips on managing multiple accounts. I feel much more confident now in navigating the Ethereum blockchain! Thanks for the great resource!
I recently started using Metamask, and I have to say it’s super user-friendly! The step-by-step guide helped me set up my wallet without any issues. I love how easily I can manage my Ethereum transactions and explore dApps. This guide is a must-read for beginners like myself. Can’t wait to dive deeper into the DeFi space!
I’ve been trying to set up my Metamask account, but I’m confused about how to securely back up my seed phrase. Can you explain why it’s so important and how I should go about doing it?
Hi SarahTech2023! Backing up your seed phrase is crucial because it serves as the key to your wallet. If you lose access to your account, your seed phrase is the only way to recover it. To back it up securely, write it down on paper and store it in a safe place—avoid storing it digitally or on cloud services to prevent hacking. Always keep it private!
I found this guide incredibly helpful! As someone who was completely new to cryptocurrency, the step-by-step instructions made setting up my Metamask wallet a breeze. I appreciate how you emphasized the importance of keeping my wallet secure. Can’t wait to explore more dApps!
I just started using Metamask, and this guide was a lifesaver! The step-by-step instructions made it so easy to set up my wallet and begin my Ethereum journey. I really appreciate how you covered the security tips too; backing up my seed phrase gives me peace of mind. Highly recommend this to anyone new to crypto!
I recently started using Metamask after reading this guide, and I must say it has simplified my Ethereum transactions immensely! The step-by-step instructions were incredibly helpful, especially for someone new to cryptocurrencies. I feel much more confident navigating dApps now. Highly recommend this guide for anyone looking to get started with Metamask!
I recently started using Metamask after reading this guide, and it has made my Ethereum transactions so much easier! I appreciate the detailed instructions for setting up my wallet and managing multiple accounts. It’s great to have a tool that simplifies interacting with dApps. Highly recommend it for newbies like me!
I recently started using Metamask, and I have to say, this guide made everything so much easier! I love how user-friendly the instructions are. I feel more confident managing my Ethereum now. Highly recommend for anyone new to crypto!
I just set up my Metamask wallet using this guide, and it was super easy to follow! The step-by-step instructions made everything clear, especially when it came to securing my seed phrase. I feel more confident navigating dApps now. Thanks for the helpful tips!
Great guide! I’m curious, how do I securely back up my seed phrase after creating my Metamask wallet? Would love to hear more about that process.
Thanks for your question, Jessica! To securely back up your seed phrase, you should write it down on paper and keep it in a safe place, preferably away from any digital devices. Avoid storing it on your computer or cloud service to minimize the risk of hacking. It’s also a good idea to create multiple copies and store them in different locations. Always remember, keeping your seed phrase private is crucial for the security of your wallet!
I found this guide incredibly helpful! As someone new to the world of cryptocurrency, the step-by-step instructions made it easy to set up my Metamask wallet. I especially appreciated the tips on securing my wallet and managing multiple accounts. Can’t wait to start exploring dApps!
I just started using Metamask, and this guide was super helpful! The step-by-step instructions made it easy to set up my wallet and connect with dApps. I appreciate how you highlighted the importance of securing my seed phrase – that’s definitely something I will remember. Looking forward to exploring more with Metamask!
I just started using Metamask, and I have to say, this guide made everything so much easier! The step-by-step instructions helped me set up my wallet without any confusion. I feel much more confident navigating the Ethereum blockchain now. Highly recommend this resource for newbies!
I recently started using Metamask and I must say, this guide is super helpful! The step-by-step instructions made setting up my wallet a breeze. I especially appreciate how it covers security tips—those are crucial for any cryptocurrency user. Can’t wait to explore more dApps with my new wallet!
I absolutely love Metamask! It makes handling Ethereum transactions so simple and secure. The step-by-step guide is really helpful for beginners, and I appreciate the emphasis on wallet security. I’d recommend this to anyone looking to get started in the crypto world.
I found this guide incredibly helpful! As someone new to Ethereum, the step-by-step approach made setting up Metamask so much easier than I expected. I appreciate the focus on security, especially the part about backing up my seed phrase. I feel much more confident handling my crypto now. Thank you for these clear instructions!
I recently started using Metamask, and this guide was super helpful! The step-by-step instructions made it easy for me to set up my wallet, and I love how I can interact with all those dApps. I feel much more confident navigating my Ethereum transactions now. Thank you for putting this together!
Great guide! I’m curious, how do I ensure my seed phrase remains secure while using Metamask?